Timeline#
Animation assets allow you to animate in raster or in vector format.
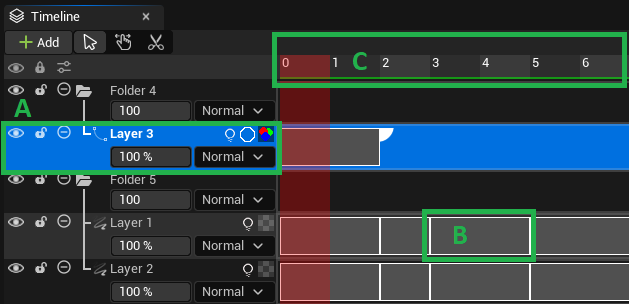
In this lesson, we will use 3 main words:
Layers, to talk about the Layers stacked in the left-hand side of the Timeline panel. (A)
Cells, to talk about main images that compose the animation. (B)
Frames, to talk about the number of images that compose the Cell or the position of the cursor in the timeline. (C)
Layers#
Structure#
The left part of the Timeline has the same structure as the Layer Stack. You can create Raster Layers, Vector Layers and Folder Layers.
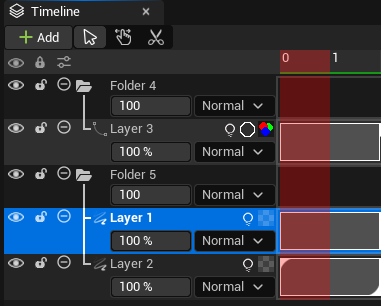
However, you will find two additional icons:
one to enable or disable the Light Table.
one to enable or disable additional details on Cells (name and exposure count)
Icon |
Description |
|---|---|

|
Light Table is off |

|
Light Table is on |

|
Cell’s names and exposure count is disabled |

|
Cell’s names and exposure count is enabled |
Behaviors#
This feature is great to force a specific behavior before the animation starts (Pre Behavior) or after it finishes (Post Behavior).
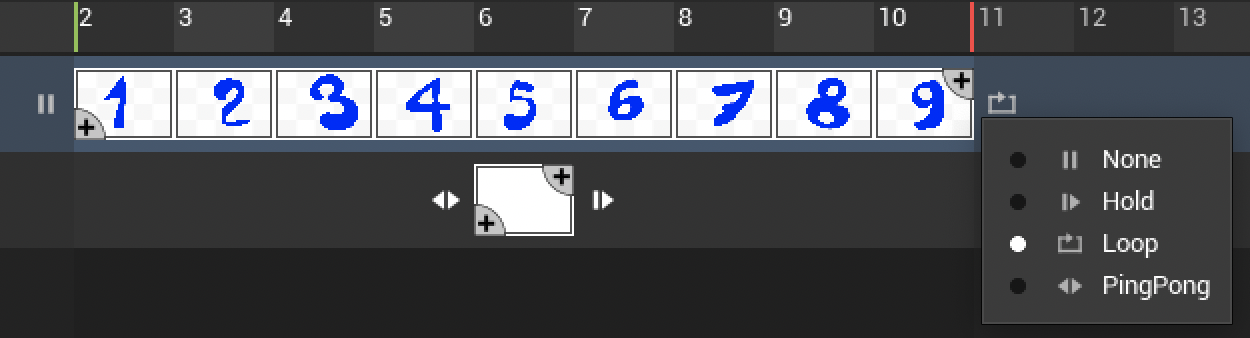
Pre and Post Behaviors have 4 options:
None: this is the default mode. Nothing will happen before or after.
Hold: it holds the first or last Frame from the animation. Ideal for Layers used to paint backgrounds or to hold the position of a character.
Loop: it loops the whole animation before it actually starts, or until another animation Layer ends.
Ping-pong: it plays the whole animation to and fro before it actually starts, or until another animation Layer ends. Ideal for some characters’ actions, like drinking a cup of tea.
Tip
You can combine Behaviors and Stagger Cells!
Cells#
Add#
To add Cells, use the large handle at the top right corner of the last current Cell.

If the animation was moved further (it does not start at Frame 0), you can also find a handle at the bottom-left corner.

You can also add Cells automatically when drawing or erasing outside a Cell:

Note
With Raster Layers, this actions will automatically allow you to paint. With Vector Layers, the action of drawing will just create the Cell (then you will be allowed to draw).
Delete#
You can also use the handle to delete Cells.

Thumbnails#
Thumbnails display automatically the content of the Cell with the color of the background set in Editor Preferences ▸ Odyssey Painter Editor (More information here). Then, change the two colors of the checker and restart Unreal Engine.

Before change#

After change#
Timeline tools#
The Timeline panel offers 3 tools to manipulate and add frames.
Icon |
Description |
Shortcut |
|---|---|---|

|
Selection tool |
V |

|
Moving tool |
A |

|
Cutting tool |
C |
Selection tool#
This is the default tool when working with the Timeline. It is used to select one or several Cells.
Action |
Description |
Example |
|---|---|---|
Select 1 Cell |
Click on a Cell to select it. |

|
Select several Cells |
Hold the click to select several Cells. |

|
Duplicate selected Cells |
Drag and drop selected Cells to duplicate them within the same Layer or to another Layer (make sure both Layers have the same type). |

|
Deselect |
Just click outside of the selected area or use the shortcut Escape. |

|
When using the Selection tool, you can also change the exposure of each Cell thanks to the tiny triangles at the top left and bottom right corner of each Cell.
The triangle at the bottom right corner will extend or reduce the duration (exposure) of the Cell and move the next Cells accordingly.

The triangle at the top left corner adjusts the duration (exposure) between two Cells, without affecting the global duration of a Layer.

Warning
Be careful with the triangle at the top left corner, for it can override Cells!
Moving tool#
The Moving tool can be used to move the whole animation from a Layer, so the animation will start sooner or later.

Cutting tool#
The Cutting tool can be used to cut a Cell into two Cells when clicking.
This tool has two possible behaviors:
Clear content (default): Dark blue stripes appears are visible. After clicking, it clears the content of the generated Cell.
Keep content: Hold Ctrl (or Cmd on Mac) when clicking to keep the content of the current Cell in the result.

Timeline Contextual Menu#
In addition of the contextual menu that appears when you right click on the Stack area (see here), there is another contextual menu when you right click on the Timeline area.
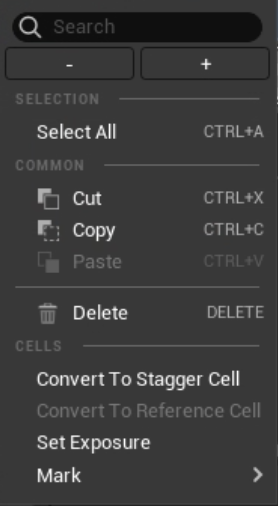
Common actions#
Select All: select all Layers, Cells and Frames.
Cut: cut selected Layers, Cells and Frames.
Copy: copy selected Layers, Cells and Frames.
Paste: paste selected Layers, Cells and Frames. It also works from an Animation 2D asset to another (but the paste can take a moment, depending on the dimension and the number of elements copied).
Delete: delete selected Cells and Frames.
Convert to Stagger Cells#
This feature allows to replicate several previous Cells and Frames in order to create a stagger animation.
Here is an animation of 6 Cells:
We increase the exposure value of the 4th Cell.

Use the Timeline Cut tool (C) to break the 4th Cell into 2 Cells.

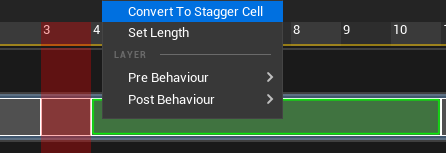
Then, use the Timeline Selection tool again (V). Make a right click on the fifth Cell freshly created and select “Convert to Stagger Cells”.

If we hover the area with a digit, we can see blue arrows on the left.

These arrows are here to indicate what are the previous Cells and Frames taken in account in the Stagger Cell. Click on the digit, then drag the slider to the right to increase the value or to the left to lower this value.
Click then on the icon with an arrow to display a small menu:
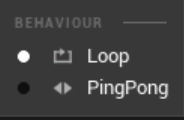
Loop: loop N previous Cells and Frames for the whole duration of the Stagger Cell (1-2-3, 1-2-3, 1-2-3…)
Ping-Pong: play N previous Cells and Frames to and fro for the whole duration of the Stagger Cell (1-2-3, 2-1, 2-3, 2-1…)
Random: choose a random display of the N previous Cells and Frames (1-3-2, 2-1-3, 2-3-1, etc)
According to the chosen mode, a tiny blank line in the Stagger Cell will indicate the cycle:

Here is the result with a loop on the 3 previous Cells:
Tip
Combine Stagger Cells and Layers’ Behaviors for nice animations!
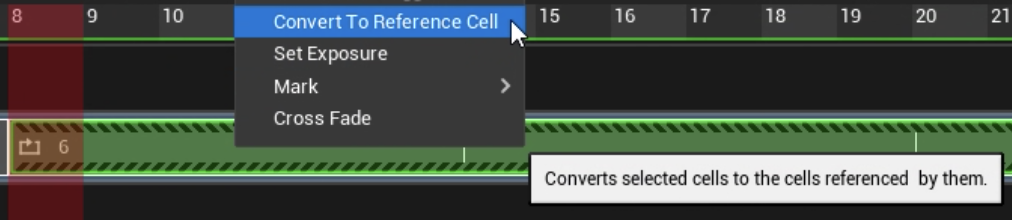
Convert to Reference Cells#
This option will work only on Stagger Cells, in Raster Layers. It will turn the Stagger Cells into Raster Cells.
Warning
This feature is not working well in Odyssey 2.1, as the converted cells will be placed at the end of the Layer, instead of staying at their original place.
Set Exposure#
Change the exposure of selected Cells.

Tip
This can also be done thanks to the button + and - in the contextual menu, of the shortcuts + and -

Name#
You can use this field to give a specific name to your Cell.
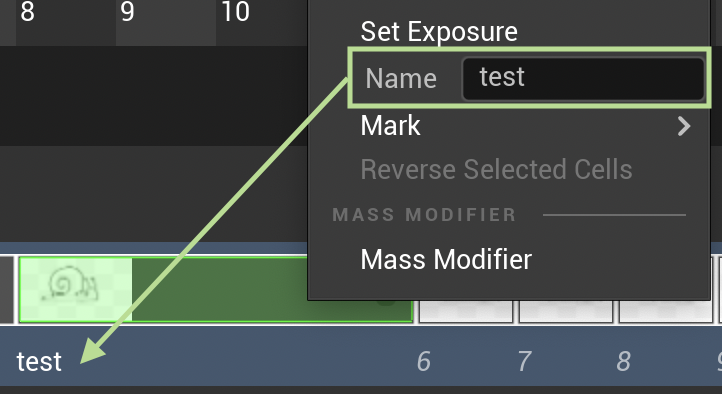
Note
Don’t forget to enable the option in the Layer Stack to display the Cell’s name.
Cross Fade#
The Cross Fade can be used to turn a long-exposed Cell into a fade animation. To achieve this, you need:
a long-exposed Cell (in the example below, it is a red rectangle)
another Cell for the mark out (in the example below, it is a blue rectangle)
Make a right click on the long-exposed Cell and select Cross Fade in the contextual menu.
Then scrub to see the result.
Mark#
Marks are simple tags to put on frames to tell them apart (Keys, Breakdowns, Character A-B-C, Retakes that are necessary, etc). Make a right click on a frame in the Cell and assign a Mark among 12 possibilities. The chosen Mark will be then displayed on top of the frame.
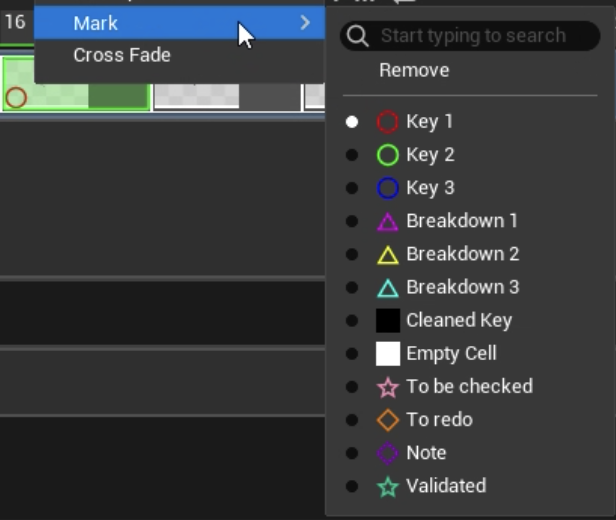
To edit the Marks (symbols & name), go to “Edit” ▸ “Project Settings” and use the search engine to type “Mark”.
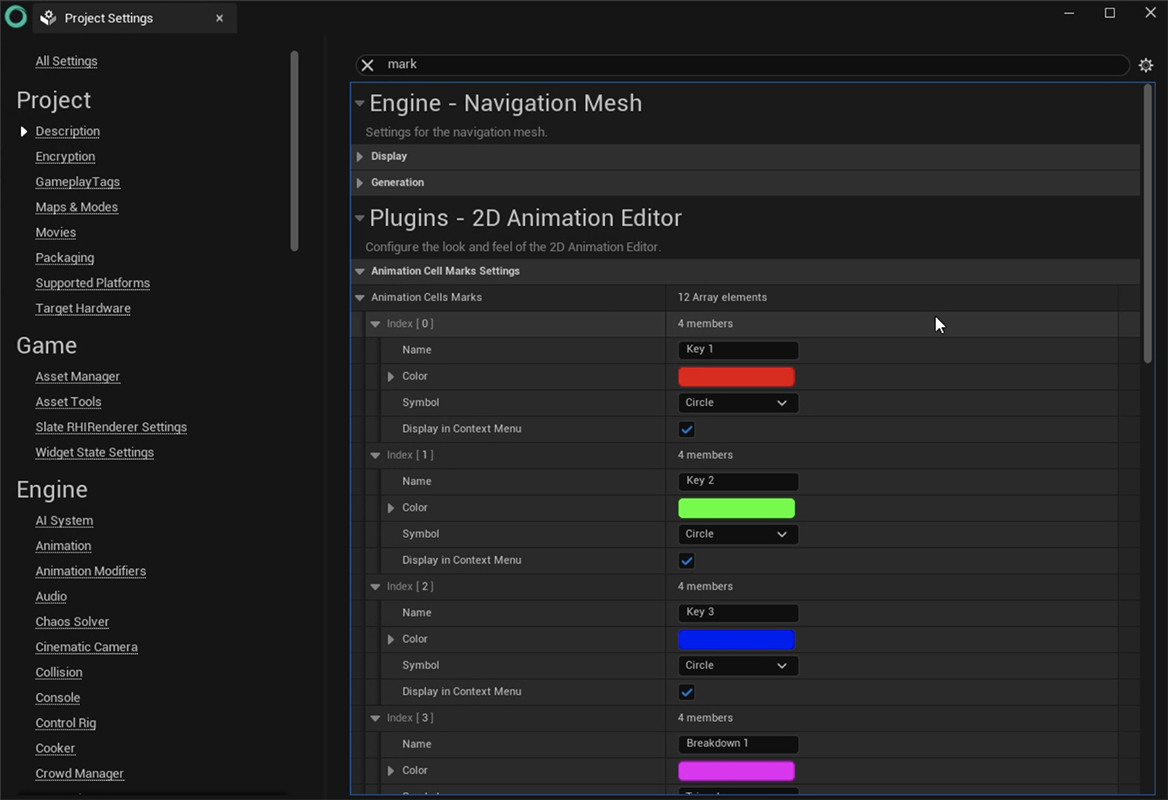
Each index corresponds to one of the 12 possible Marks. You cannot delete or add new Marks.
Data |
Description |
|---|---|
Name |
Write the name to be displayed in the contextual menu. |
Color |
The color of the symbol |
Symbol |
The type of symbol: Triangle, Circle, Diamond and Star (the four of them can be filled or outlined), Cross, Checkmark and Fill. The last one will simply fill the entire Cell. |
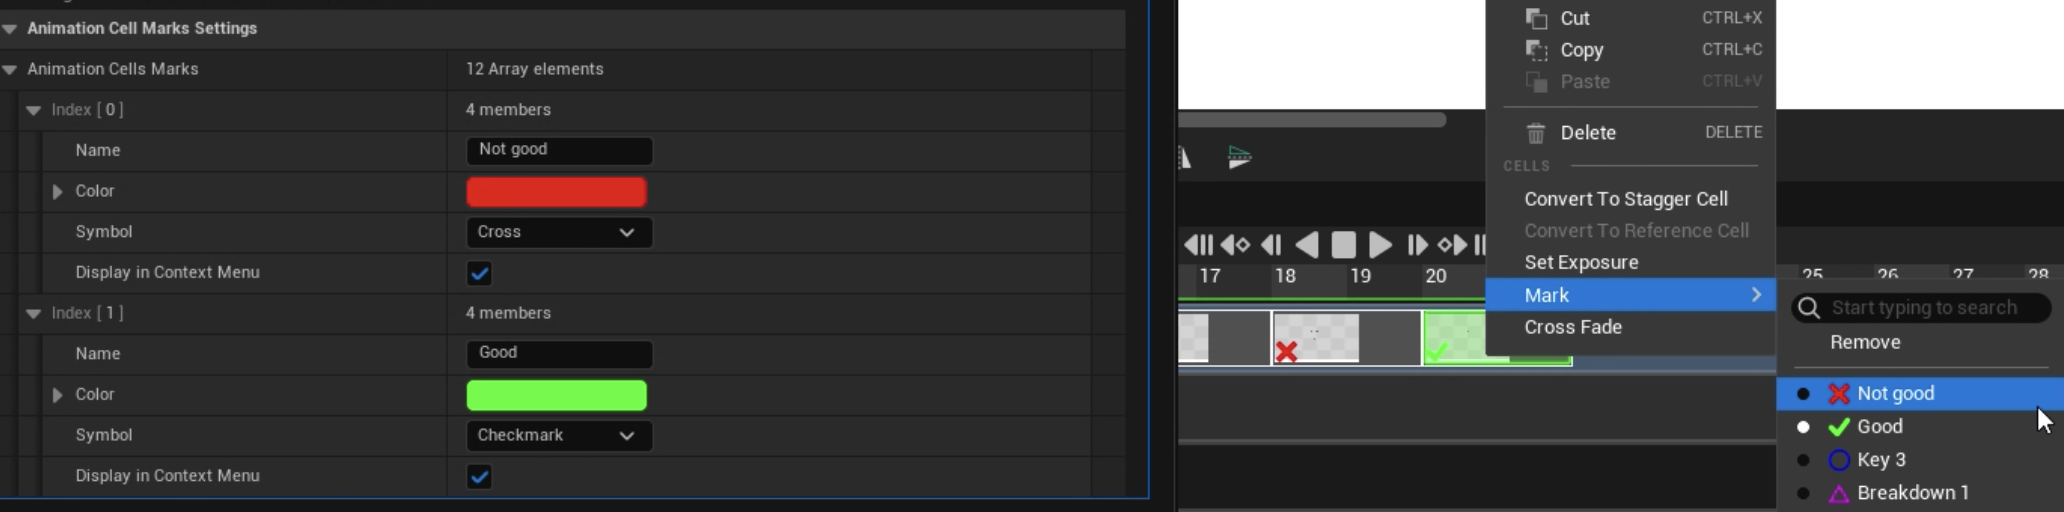
Here is an example of a 2 Marks that got modified:
Note
Marks are shared with the whole project. In case of collaborative work, this ensures all 2D animators will work with the same symbols.
Tip
You can combine Marks and Flip!
Reverse Selected Cells#
Use this feature to rever the order of selected Cells:
Mass Modifier#
This part is covered in a dedicated page to be read here.
Navigation and play#
Scrub#
You can scrub the Timeline by holding the click at the top area of the panel, where Frames are visible. Then drag the cursort to the right or to the left.

Pan#
To pan in the timeline, use the shortcut M+LMB

Zoom#
To zoom in and out the timeline, use the shortcut M+RMB. Zoom will be done depending the position of your mouse cursor.

You can also use Ctrl+Mousewheelup or Ctrl+Mousewheeldown. This one will always focus on the left side of the Timeline.

Play#
You can also navigate in the timeline by using the following icons.
Icon |
Description |
|---|---|

|
to go to start frame or end Frame. |

|
to move backward / forward from Cells to Cells. |

|
to move backward / forward from Frame to Frame. |

|
to play backward / forward the animation. |
When the animation is played, the icon turns into a pause button.

Icon |
Description |
|---|---|

|
to stop the animation (cursor will go to its original position). |

|
to play the animation as a loop. |

|
to play the animation once. |
You can toggle Play / Pause with the shortcut Spacebar
Flip#
Flip is a specific feature which allows you to scrub in the Timeline according to various parameters (limits, type of keys, direction, etc), by using a combination of a hold keyboard shortcut and a movement with your stylus or mouse.
Flip is not activated by default and has to be configured in “Edit” ▸ “Editor Preferences”, into 2 different sub-categories:
in “2D animation Editor”, you will have to configure the Flips;
in “Keyboard Shortcuts”, you will have to assign a key to these Flips.
Note
Contrary to Marks that are the same for everyone working on the project, Flips are related to the Editor Preferences, which means anyone can have a personal configuration.
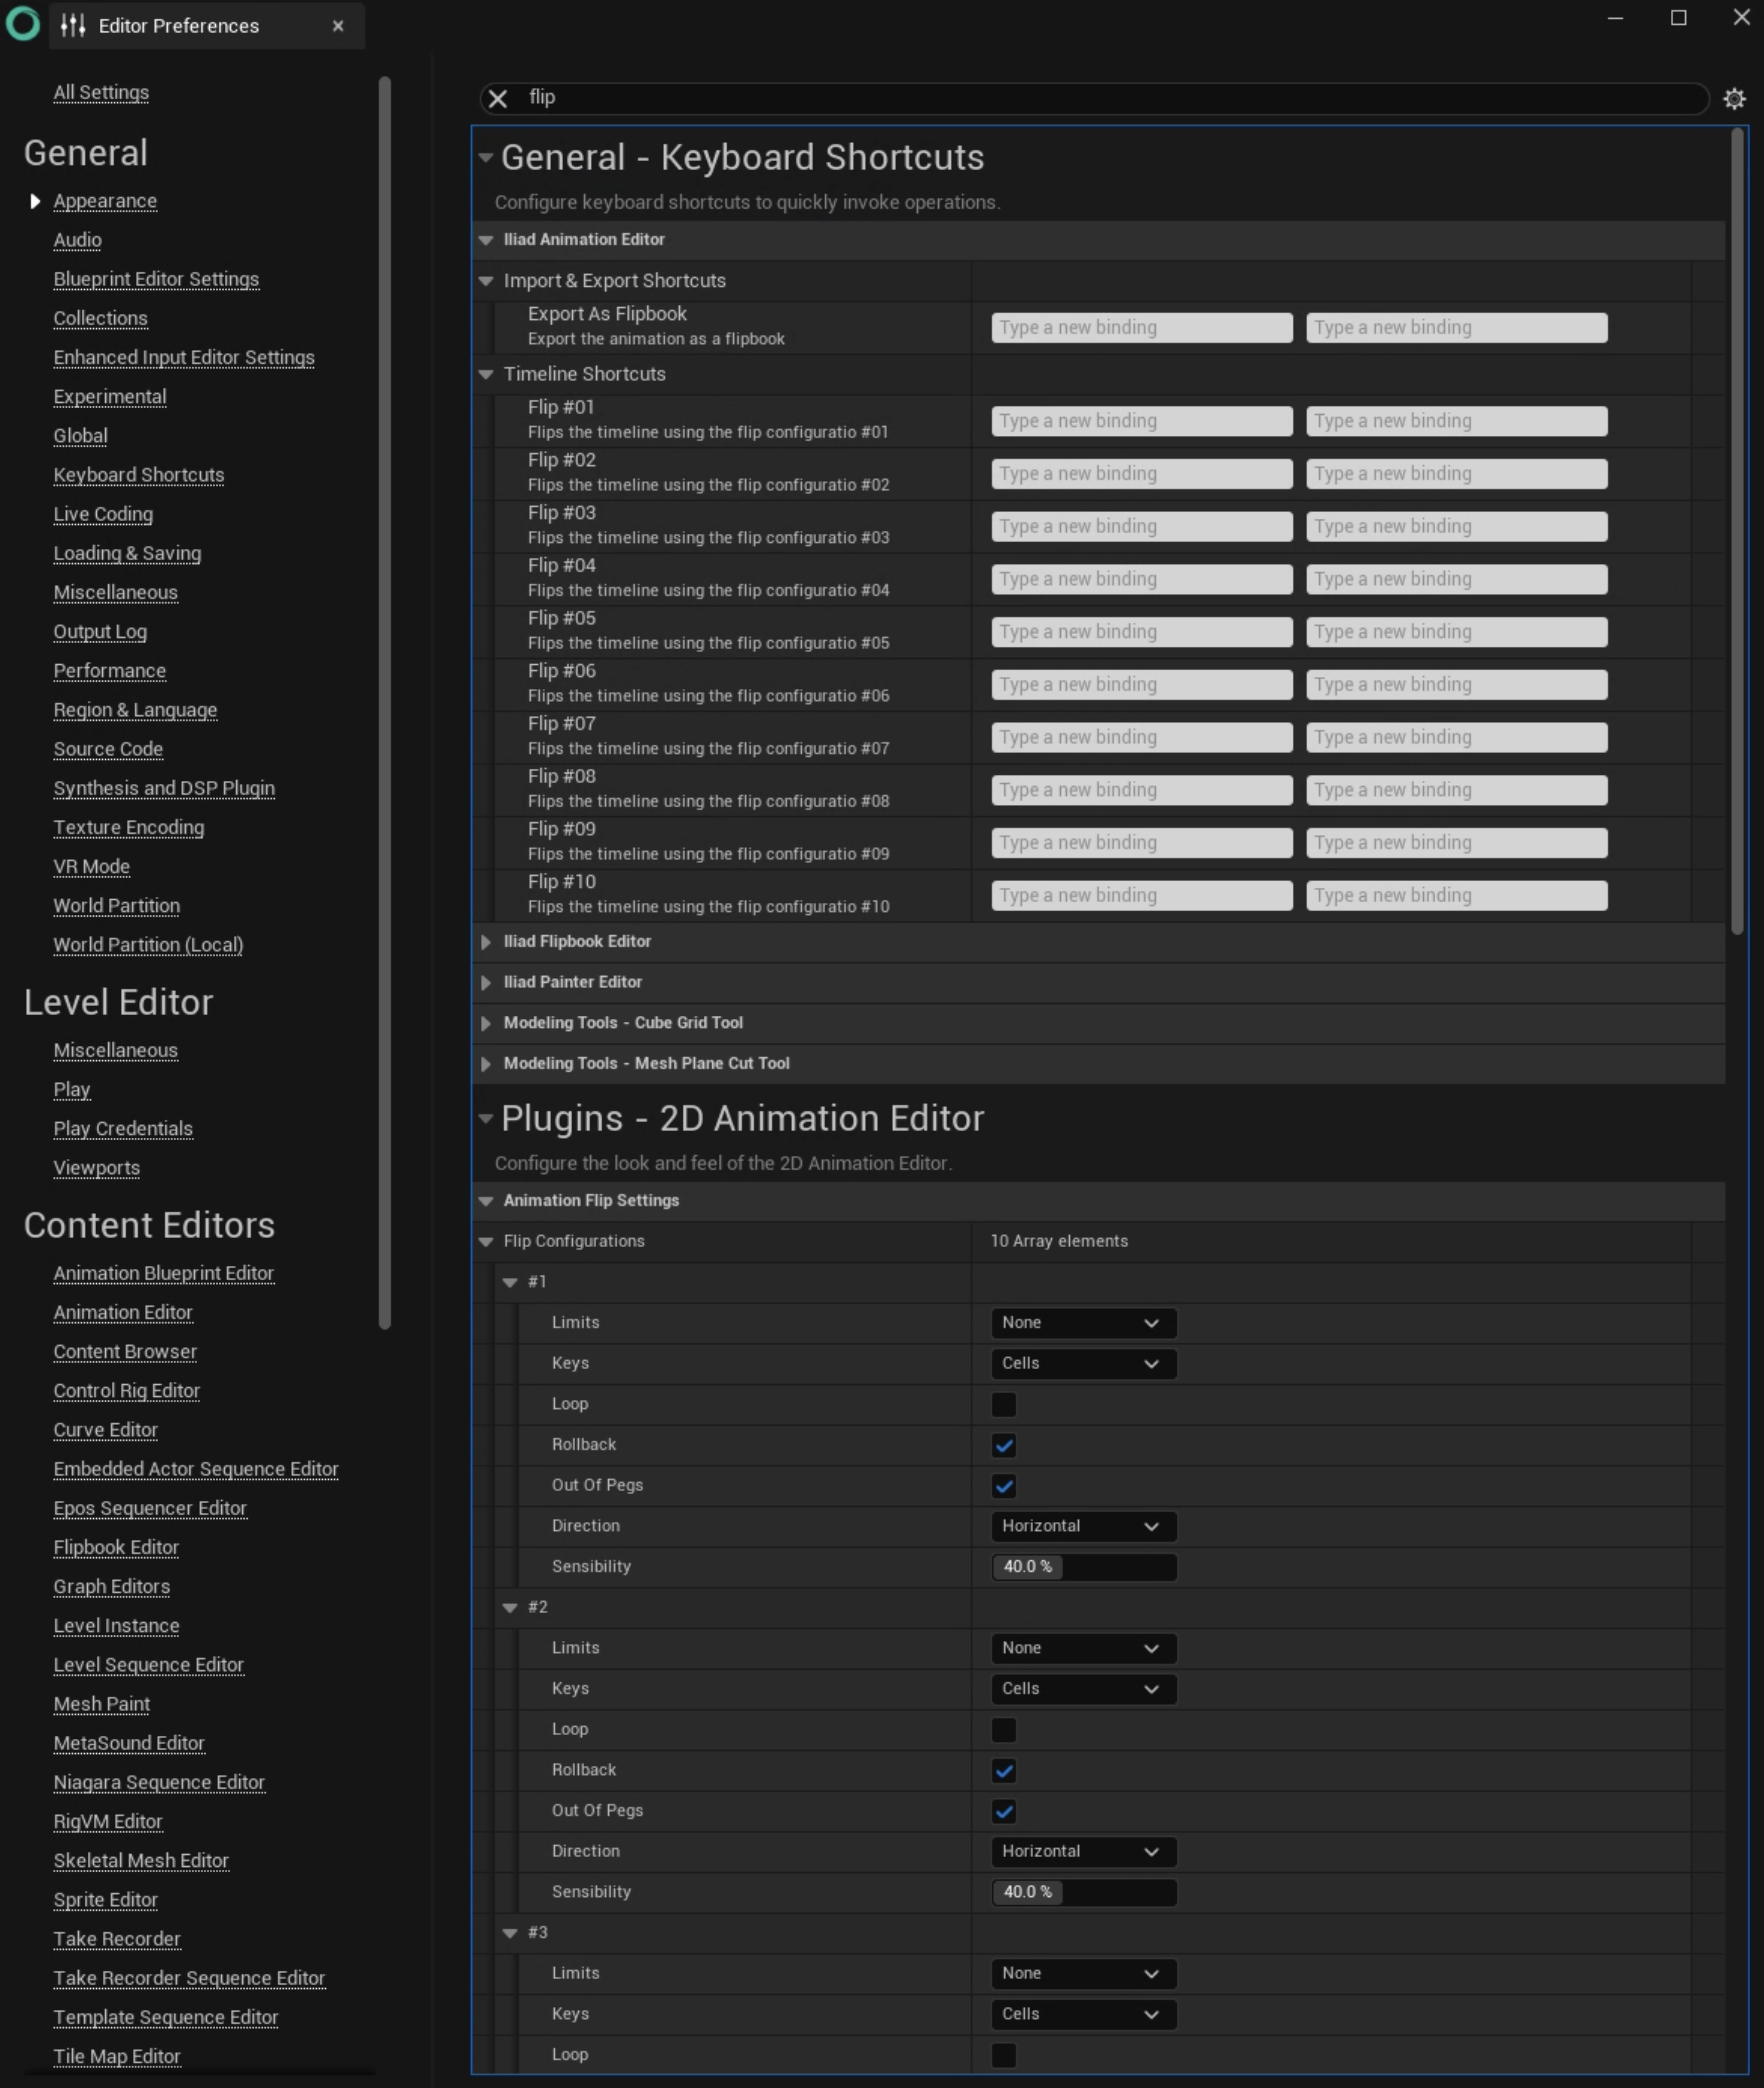
You can configure and assign 10 different Flips.
Tip
To configure them properly, we advise you to dock the panel Editor Preferences aside a window with an Animation 2D asset.
Flip configuration#
Type |
Description |
|---|---|
Limits |

|
Keys |
|
Loop |
|
Rollback |
|
Out-of-Pegs |
|
Direction |
|
Sensibility |
The sensitivity of the gesture. The higher the percentage, the more sensitive (and faster) the Flip. |
Flip Keyboard Shortcuts#
Each Keyboard Shortcut corresponds to a possible Flip configuration:
The key binded to Flip #01 will use the configuration of the 1st Flip.
The key binded to Flip #02 will use the configuration of the 2nd Flip.
And so and on, until the 10th Key and Flip configuration.
To bind a Key to a Flip, simply click on the empty area “Type a new binding” and hit the key (i.e. 5) or a combination of keys (i.e. Ctrl+5).
In the example below, you can see 2 Flips configured and assigned to 5 and 2: