Animation
The main purpose of Odyssey is to make 2D animations. To do so, Praxinos team created Animation assets. Animation assets allow you to animate in raster or in vector format, with the help of a light table.
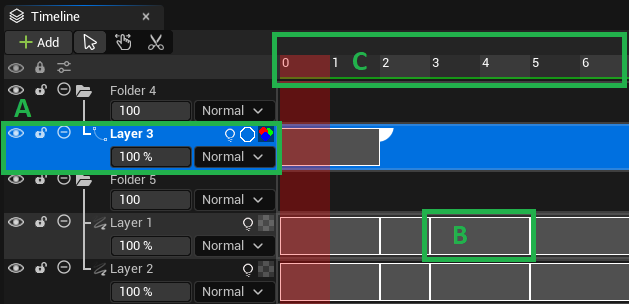
In this lesson, we will use 3 main words:
Layers, to talk about the Layers stacked in the left-hand side of the Timeline panel. (A)
Cells, to talk about main images that compose the animation. (B)
Frames, to talk about the number of images that compose the Cell or the position of the cursor in the timeline. (C)
Timeline
Timeline Stack (Layers)
The Timeline has the same structure as the Layer Stack of Textures 2D. You can create Raster Layers, Vector Layers and Folder Layers.
To know more about the options available for layers (Opacity, Blend modes, etc) or how to add them, please read this lesson.
Cells
Add
To add Cells, use the large handle at the top right corner of the last current Cell.

If the animation was moved further (it does not start at Frame 0), you can also find a handle at the bottom-left corner.

Delete
You can also use the handle to delete Cells.

Timeline tools
The Timeline panel offers 3 tools to manipulate and add frames.
Icon |
Description |
|---|---|

|
Selection tool |

|
Moving tool |

|
Cutting tool |
Selection tool
This is the default tool when working with the Timeline. It is used to select one or several Cells and Frames.

Selected Cells and Frames can then be duplicated with a drag and drop, either within the same Layer, or from a Layer to another one (make sure both Layers have the same type).

To deselect, just click outside of the selected area.

When using the Selection tool, you can also change the exposure of each Cell thanks to the tiny triangles at the top left and bottom right corner of each Cell.
The triangle at the bottom right corner will extend or reduce the duration (exposure) of the Cell and move the next Cells accordingly.
The triangle at the top left corner adjusts the duration (exposure) between two Cells, without affecting the global duration of a Layer.
Warning
Be careful with the triangle at the top left corner, for it can override Cells!

Moving tool
The Moving tool can be used to move the whole animation from a Layer, so the animation will start sooner or later.

Cutting tool
When a Cell gets a long exposure, it can be broken thanks to the Cutting tool.
Place your cursor on a Frame within the Cell and use LMB to cut the Cell into two Cells.

Timeline Contextual Menu
In addition of the contextual menu that appears when you right click on the Stack area (see here), there is another contextual menu when you right click on the Timeline area.

Common actions
Select All: select all Layers, Cells and Frames.
Cut: cut selected Layers, Cells and Frames.
Copy: copy selected Layers, Cells and Frames.
Paste: paste selected Layers, Cells and Frames. It also works from an Animation asset to another (but the paste can take a moment, depending on the dimension and the number of elements copied).
Delete: delete selected Cells and Frames.
Stagger Cells
This feature allows to replicate several previous Cells and Frames in order to create a stagger animation.
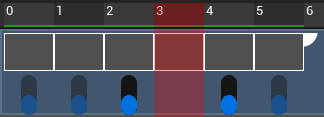
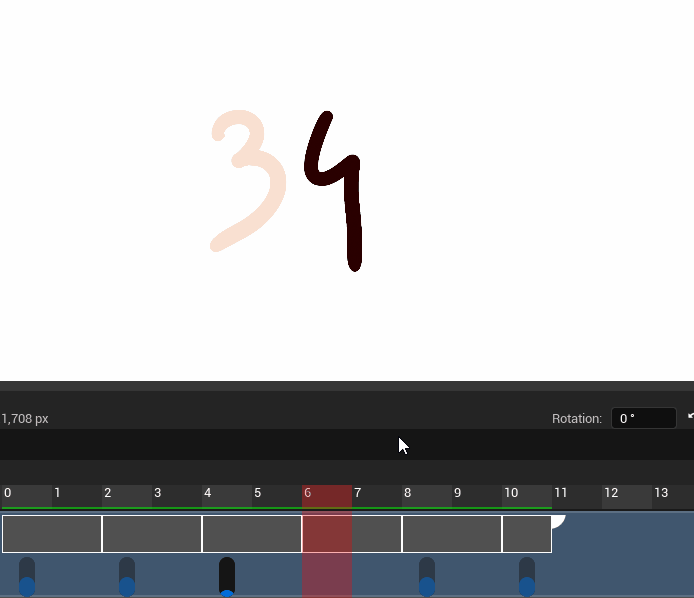
Here is an animation of 6 Cells:
We increase the exposure value of the 4th Cell.
We make a right click on the second Frame that composes this Cell and select “Stagger Cells”.
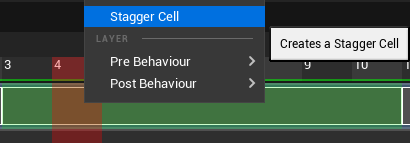
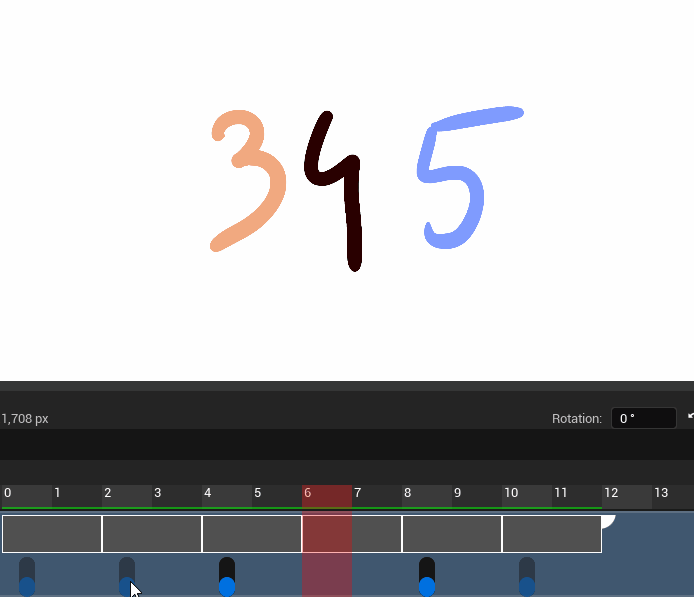
The 4th Cell will be cut in two and this Stagger Cell will appear:
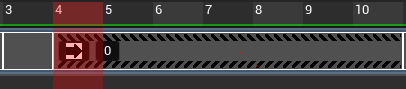
If we hover the area with a digit, we can see blue arrows on the left.

These arrows are here to indicate what are the previous Cells and Frames taken in account in the Stagger Cell. Click on the digit, then drag the slider to the right to increase the value or to the left to lower this value.

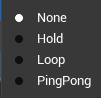
Click then on the icon with an arrow to display a small menu:
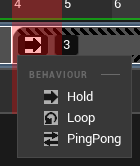
Hold: behave like a Cell with a longer exposure (to be deleted in a future update).
Loop: loop N previous Cells and Frames for the whole duration of the Stagger Cell (1-2-3, 1-2-3, 1-2-3…)
Ping-Pong: play N previous Cells and Frames to and fro for the whole duration of the Stagger Cell (1-2-3, 2-1, 2-3, 2-1…)
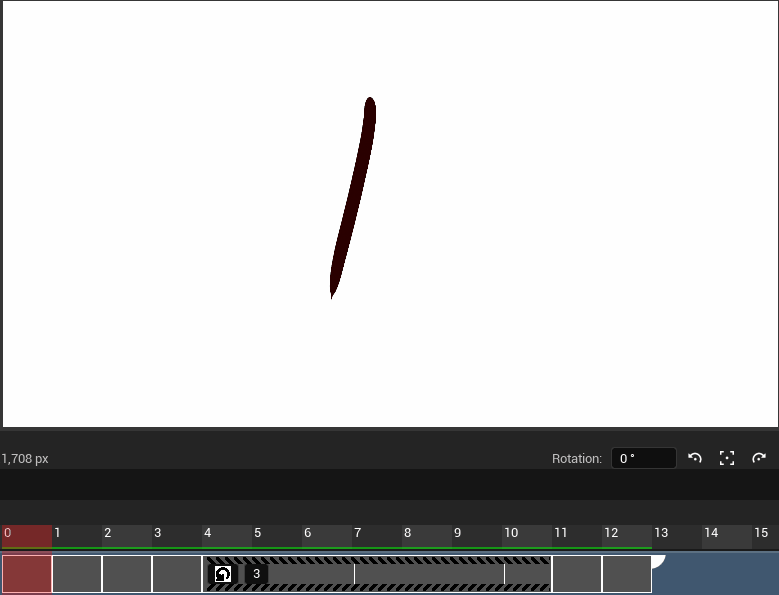
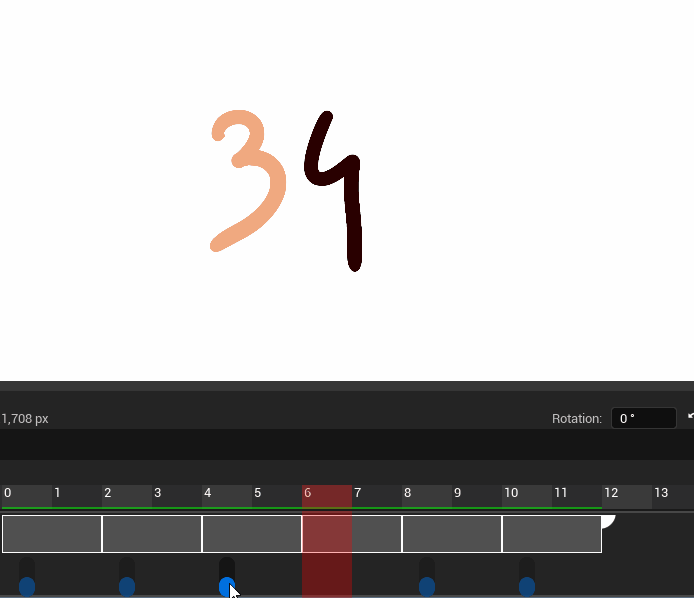
According to the chosen mode, a tiny blank line in the Stagger Cell will indicate the cycle:
Loop:

Ping-Pong:

Here is the result with a loop on the 3 previous Cells:
Behaviours
This feature is great to force a specific behaviour before the animation starts (Pre Behaviour) or after it finishes (Post Behaviour).
Pre and Post Behaviours have 4 options:
None: this is the default mode. Nothing will happen before or after.
Hold: hold the first or last Frame from the animation. Ideal for Layers used to paint backgrounds, for instance.
Loop: loop the whole animation before it actually starts, or until another animation Layer ends.
Ping-pong: play the whole animation to and fro before it actually starts, or until another animation Layer ends.
Note
There is no icon for that feature at the moment. It’s in our todo list :)
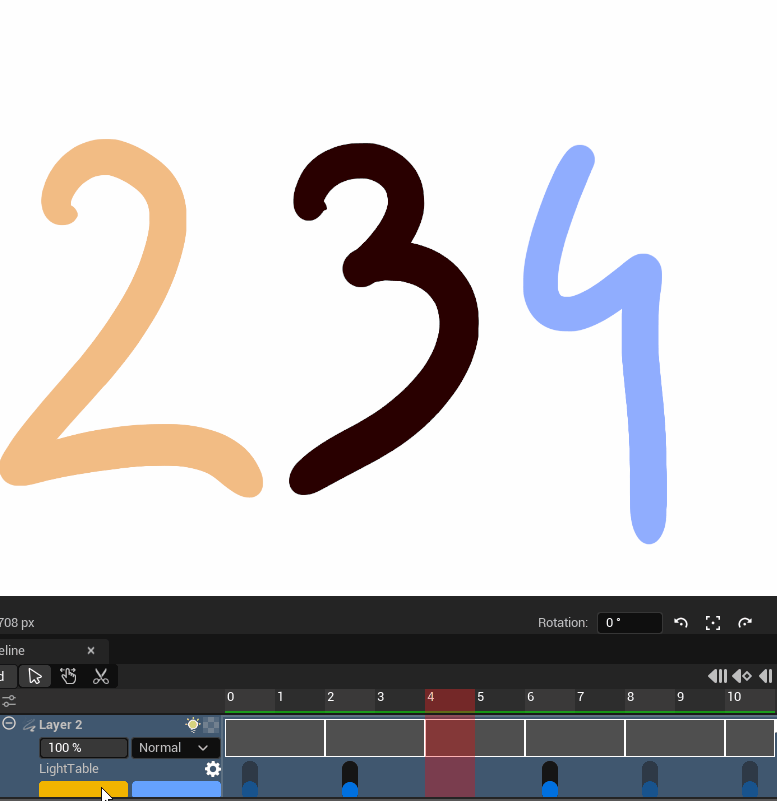
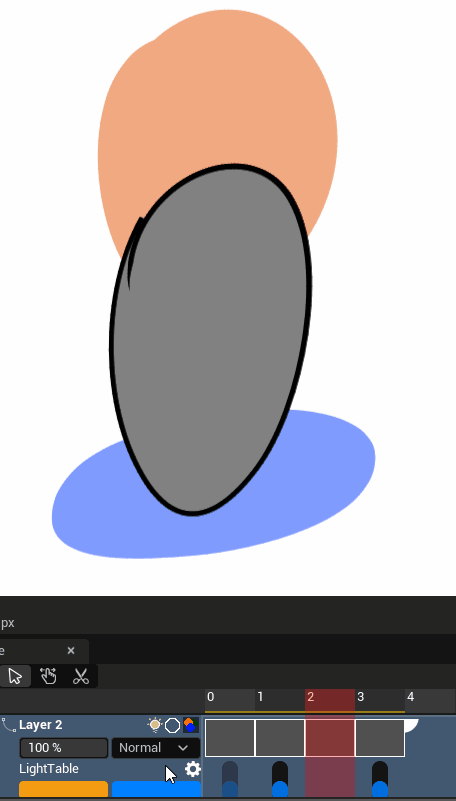
Light Table
In an Animation asset, each Layer displays an additional icon with a light bulb. This icon will enable or disable the Light Table (onion skin).
Icon |
Description |
|---|---|

|
Light Table is on |

|
Light Table is off |
When enabling the Light Table, you will see blue cursor under the first Frame of each Cells.
Each activated dot allows you to see by transparency previous and next Cells.
You can increase or decrease the opacity by holding the click on a blue dot and drag the cursor to the top (to increase the opacity) or to the bottom (to decrease the opacity).
The parameters of the Light Table always adapt to the position in the timeline:
Other parameters for the Light Table are also visible on the Stack area.
The color on the left is for previous Cells. The color on the right is for next Cells. Click on the colored square to modify it.
You can also mofify other settings by clicking on the gear icon:
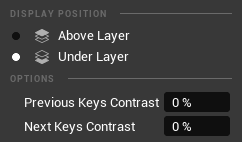
Display position: this option is really useful with Vector Layers that are colorised. It forces the Light Table to be either displayed above or under the current Cell.
Contrasts: this option also is really useful with Vector Layers that are colorised. It creates a contrast to make the difference between the line and the colored aread.

You can also find a panel Light Table, which is really basic.
Navigation and play
Scrub
You can scrub the Timeline by holding the click at the top area of the panel, where Frames are visible. Then drag the cursort to the right or to the left.

Play
You can also navigate in the timeline by using the following icons.
Icon |
Description |
|---|---|

|
to go to start frame or end Frame. |

|
to move backward / forward from Frame to Frame. |

|
to move backward / forward from Frame to Frame. |

|
to play backward / forward the animation. |
When the animation is played, the icon turns into a pause button.

Icon |
Description |
|---|---|

|
to stop the animation (cursor will go to its original position). |

|
to play the animation as a loop. |

|
to play the animation once. |