Step 3 - Add Camera & Plane
Click on the icon below to be displayed a panel to configure your Camera, the Plane and the Texture 2D.
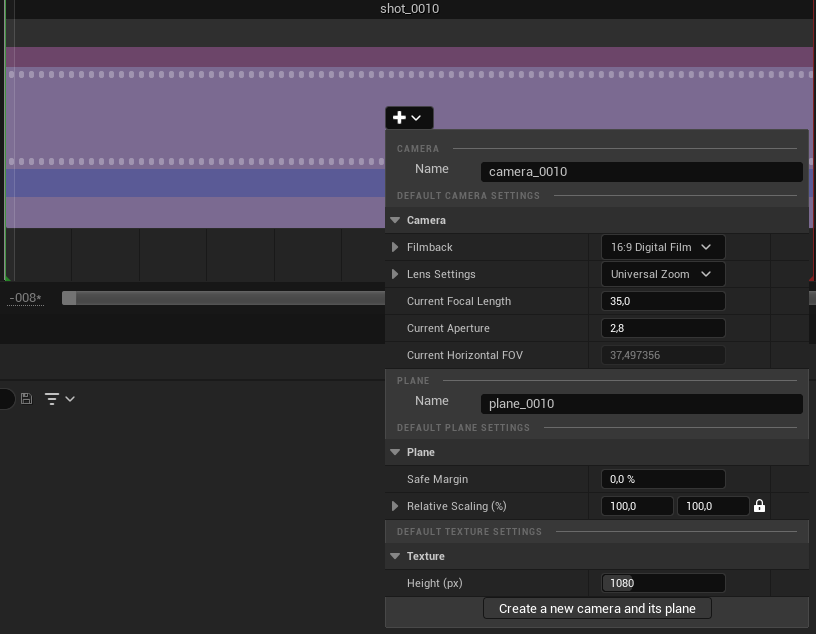
Camera Settings
Camera options will allow you to change :
the Film ratio
the Lens Settings (like a real camera)
the Focal Length
the Aperture
Plane Settings
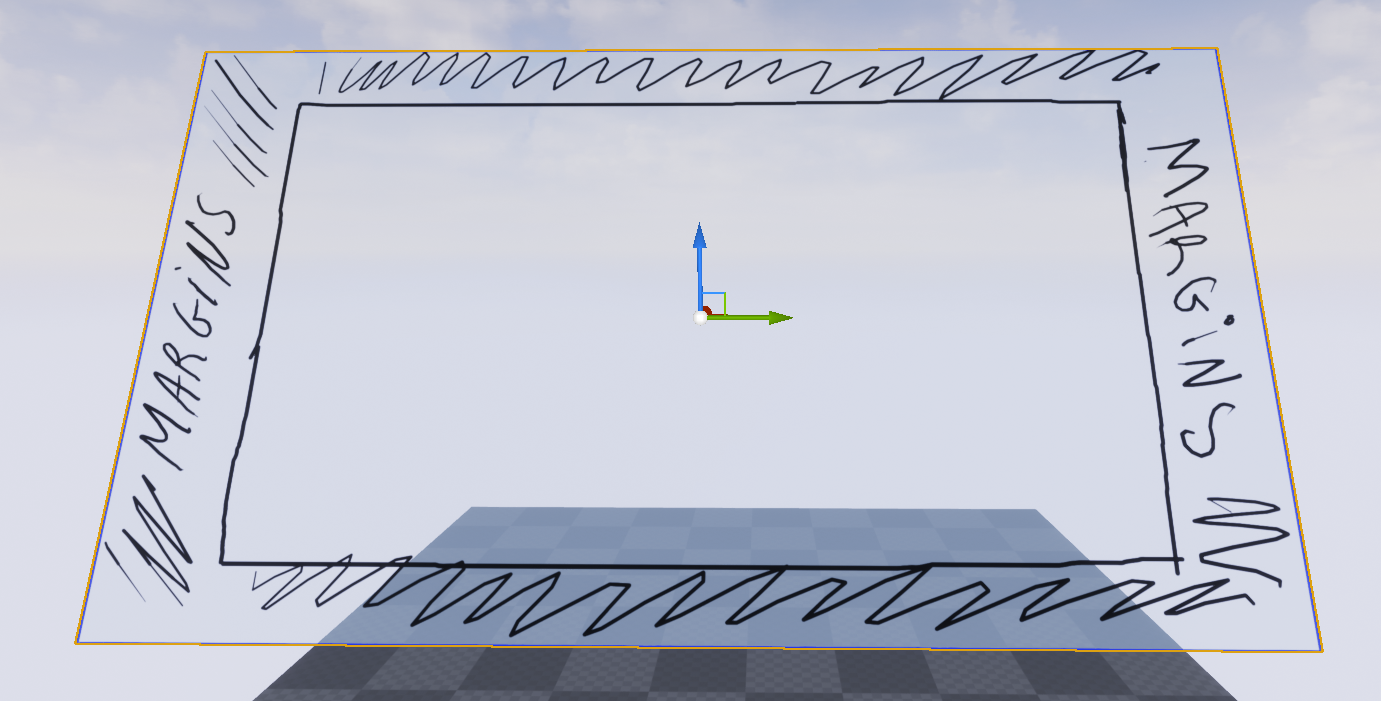
The Plane option can be used to add extra margins outside the Camera view : this is very handy, especially if you need to modify the Plane position and size.
Texture Settings
In the Texture Area, you can change the Texture’s height in pixels. Width will be automatically calculated depending on the Camera properties. For instance: with a 16/9 ratio Camera, a Texture with a height of 1080px will have a width of 1920px.
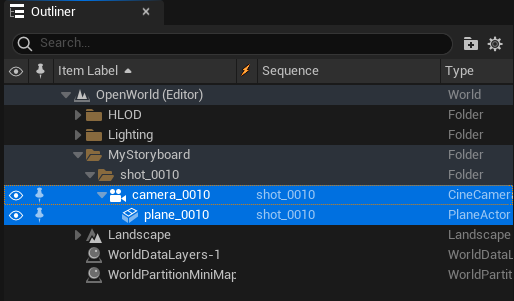
World Outliner
After hitting the Camera button, you will add a Plane and a Camera Actor in your Level. Both will be then visible in the panel World Outliner.
Storyboard Viewport and piloting Camera
When adding a new Plane + Camera, you will automatically pilot the Camera Actor and move the Plane simultaneously.
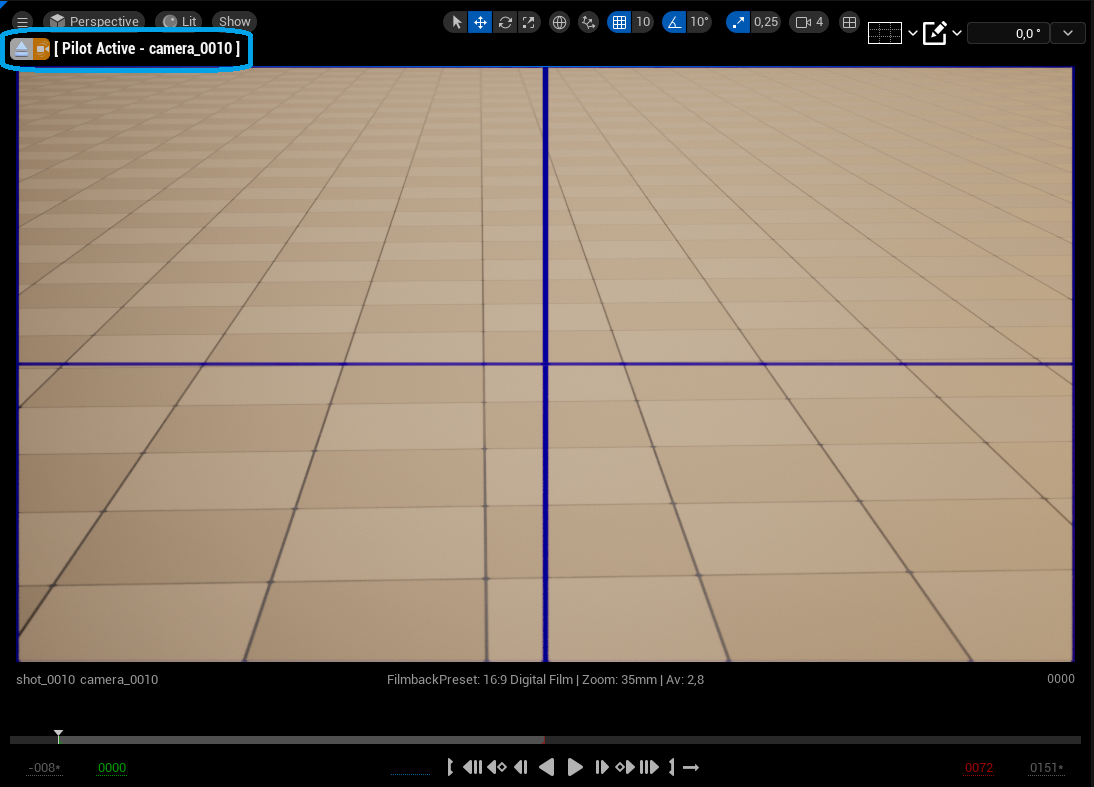
Using shortcuts Up, Down, Left and Right to move them shall help you to find the right angle and perspective. You can also use your mouse buttons (Left, Middle and Right clicks). Click on the Eject button to stop piloting the Camera.
