Working with Actors
In Unreal Engine, an Actor refers to any item that can be added or spawned within a level. There are many different types and sub-types of actors, such as:
Meshes (Skeletal, Static)
Lights (Directional, Point, Sky, Spot, Rectangular…)
Cameras
Blueprints
Visual Effects (Decals, Post-Process Volumes…)
This lesson will not go into the details of every types of Actors and their many different settings. We will just go through basics to help you to get started.
Again, for more information, we strongly advise you to complete your knowledge with Unreal Engine User Documentation: https://docs.unrealengine.com/
Add Actor
From the Engine
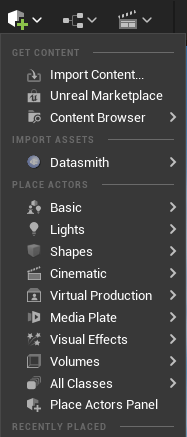
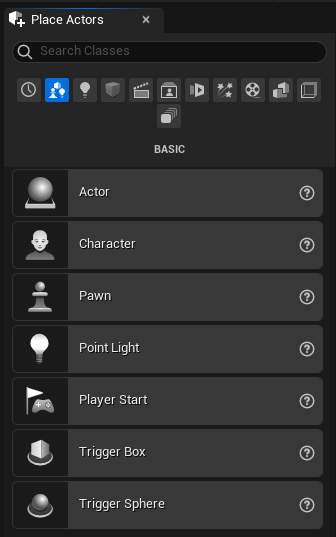
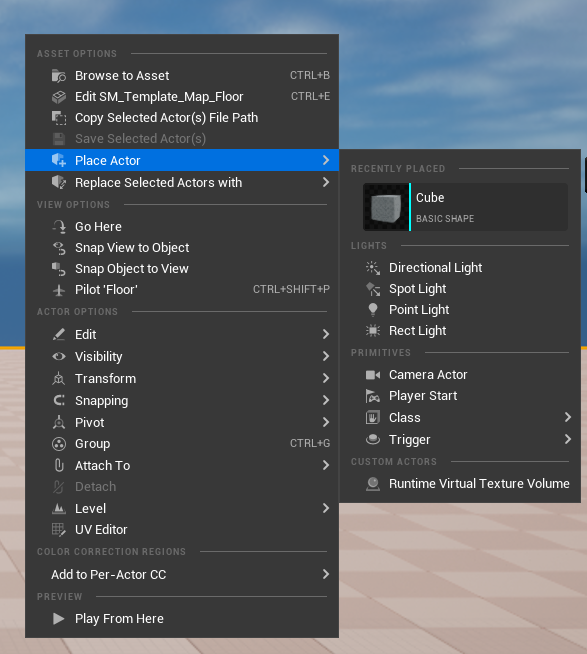
You can add Actors available natively in the engine:
With a click on this icon at the Main Tool Panel:
Thanks to the panel “Place Actor” which is available in the menu “Window”
With a right click in the Viewport
From the Content Drawer / Browser
To add an Actor in the Level from an asset of the Content Browser, there are several possibilities, depending on the nature of the assset.
Drag and drop meshes (Static, Skeleta) into the Viewport’s Level will create a (Static/Skeletal) Mesh Actor.
Drag and drop a Texture 2D on a Mesh Actor will generate a Material into the Content Browser, which will be assigned to the Mesh Actor.
Drag and drop a Material on a Mesh Actor will apply the Material on the Mesh Actor.
Use the Foliage Editor to paint with Mesh Actors (more information here)
And there are many other cases, of course.
Actor’s position, rotation and scale
Viewport’s Transform & Gizmo

The Transform Tools serve as your primary means of manipulating objects within the viewport. There are 4 tools available:
Select Tool Q
Move Tool W
Rotate Tool E
Scale Tool R
By selecting an object, you can scroll through transform tools with the Spacebar.

Note
To disable the rotation with an arcball, go to “Edit ▸ Editor Preferences ▸ Enable Arcball Rotate”.

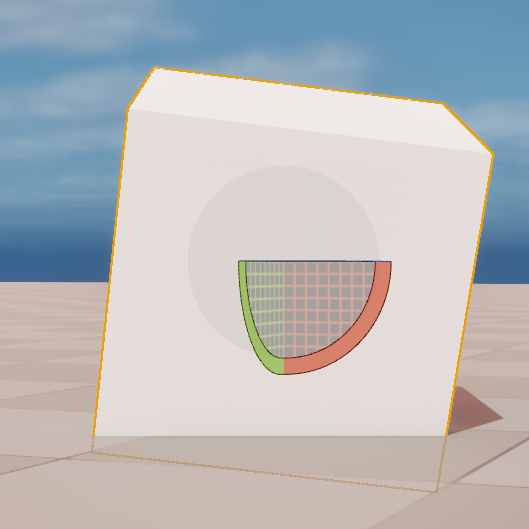
Gizmo local or world


Cycles the transform gizmo coordinates systems between world and local.
Snaps
Those are the various snapping methods available.
Surface snapping makes Actors align to the floor or another surface. Enable surface snapping from the Level Viewport toolbar: click the Surface Snapping button, then enable the Surface Snapping option. It controls how objects snap to surfaces.

Snap to position grid
To snap the position of an Actor to a position grid. Click on the digits to increase or decrease the value of the position snap.

Click on the grid icon to disable the position snap.

Snap to rotation grid
To snap the rotation of an Actor to a rotation grid. Click on the digits to increase or decrease the value of the angle. You can also enable “Preserve Non-Uniform Scale” for objects that have been non-uniformly rescaled on different axes.

Click on the angle icon to disable the rotation snap.

Snap to scale grid
To snap the scale of an Actor to a scale grid. Click on the digits to increase or decrease the value of the scale.

Click on the scale icon to disable the scale snap.

Using Details panel
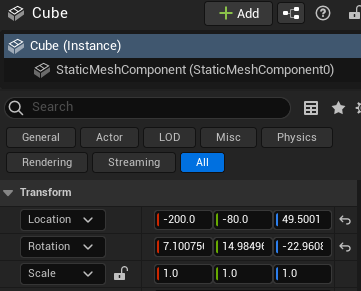
When selecting an actor from the Viewport or the Outliner, you can also transform the selected actors in the panel Details.
Note
Not all actors can be affected by position, rotation or scale. For instance, Directional Lights can only be rotated. Its position or its scale will not change anything.
Duplicate Actor
Copy & Paste: Select an object in the Viewport or in the Outliner and press Ctrl+C and then Ctrl+V.
Duplicate: Exactly the same as copy paste, but with Ctrl+D.
Drag & Duplicate: While holding down the Alt key on your keyboard, use the left mouse button to select and drag one of the three arrows on the actor’s gizmo. This will duplicate the object while it is moved to its new location.
Delete Actor
Even though you can use the key Delete to delete an actor, we do not advise you to use this shortcut, as it can lead to crashes, depending on the context.
To properly delete an Actor, first make sure it is not involved with an Editor Mode or with a Sequence in use.
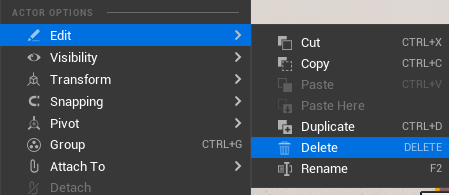
Once you are sure everything is safe, you can make a right click on the Actor (from the Viewport or the Outliner Panel) and select “Edit ▸ Delete”
Use an Actor into a Sequence
This part is explained in the lesson about Tracks in the Sequence.