Basics
This lesson will teach you the basics to understand and use Level Sequences for anything but storyboard. To learn how to make storyboard sequences, please read this lesson.
Add a camera
As you know thanks to this lesson, there are various types of Actors in Odyssey.
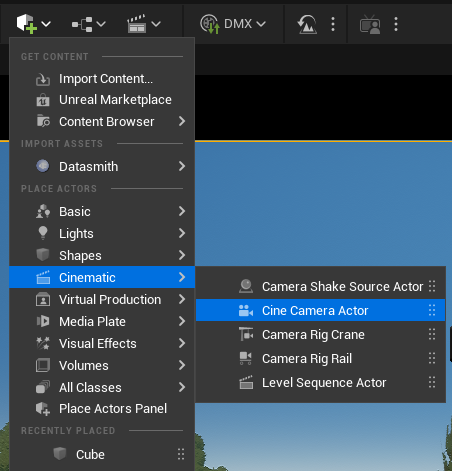
We are going to add a Cine Camera Actor, from the category Cinematic.
Note
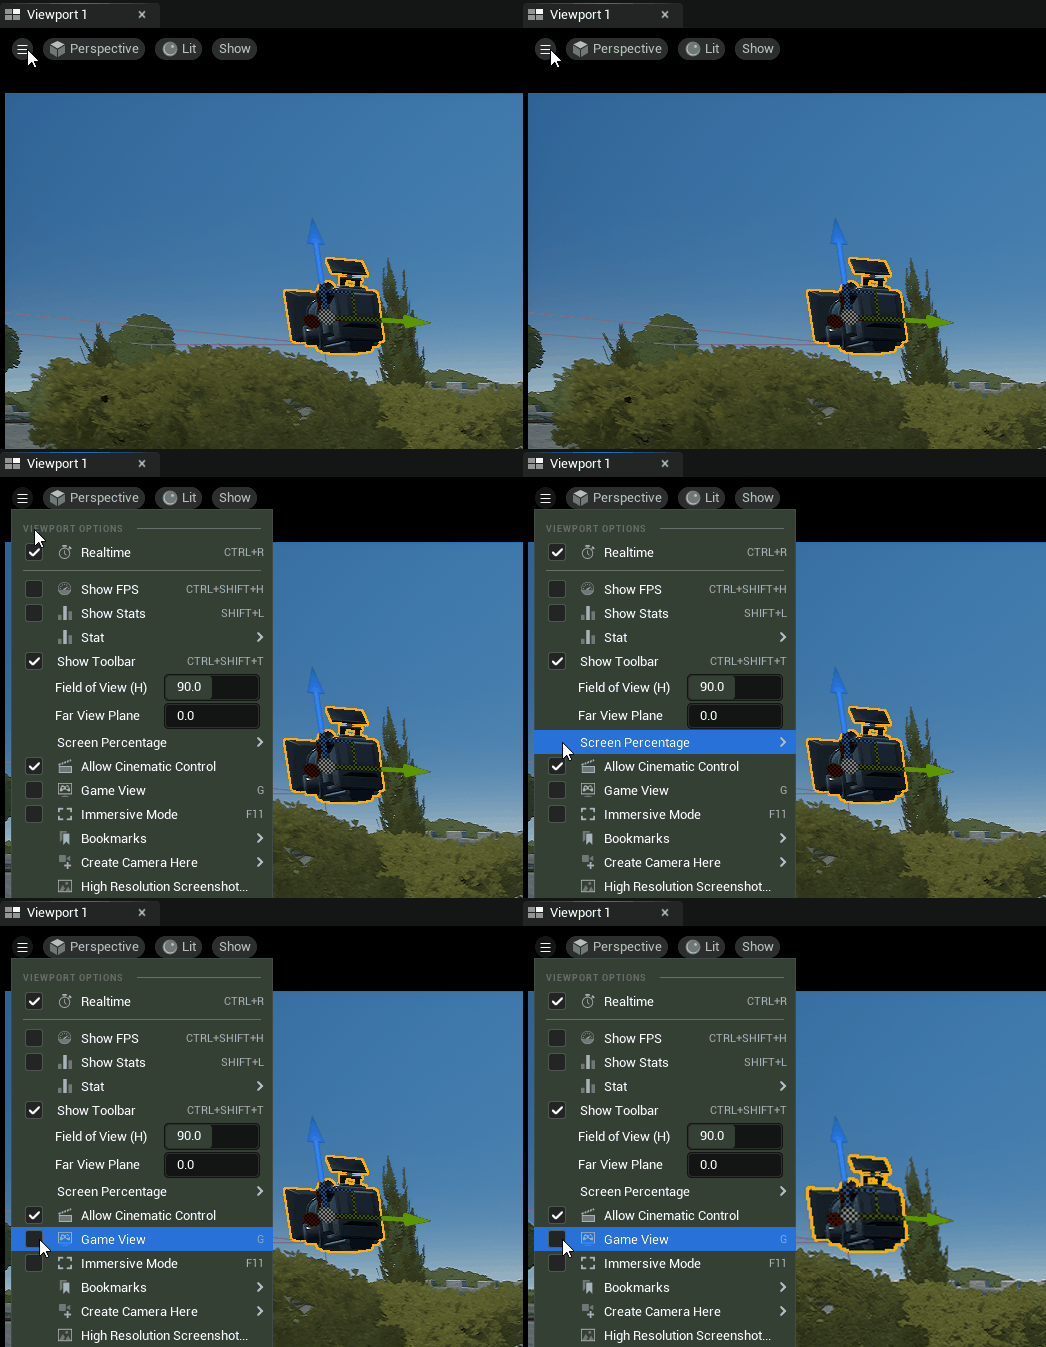
The camera might not be visible by default in the Viewport, despite its presence in the Outliner panel. If you want to show the camera, change the Viewport options to disable the Game View, or hit G.
Once created, this Cine Camera Actor can be added to the Level Sequence with a drag and drop. It will create 2 tracks: a Camera Cuts track and a Cine Camera Actor track. Plus, you will automatically see the environment through the camera point of view.
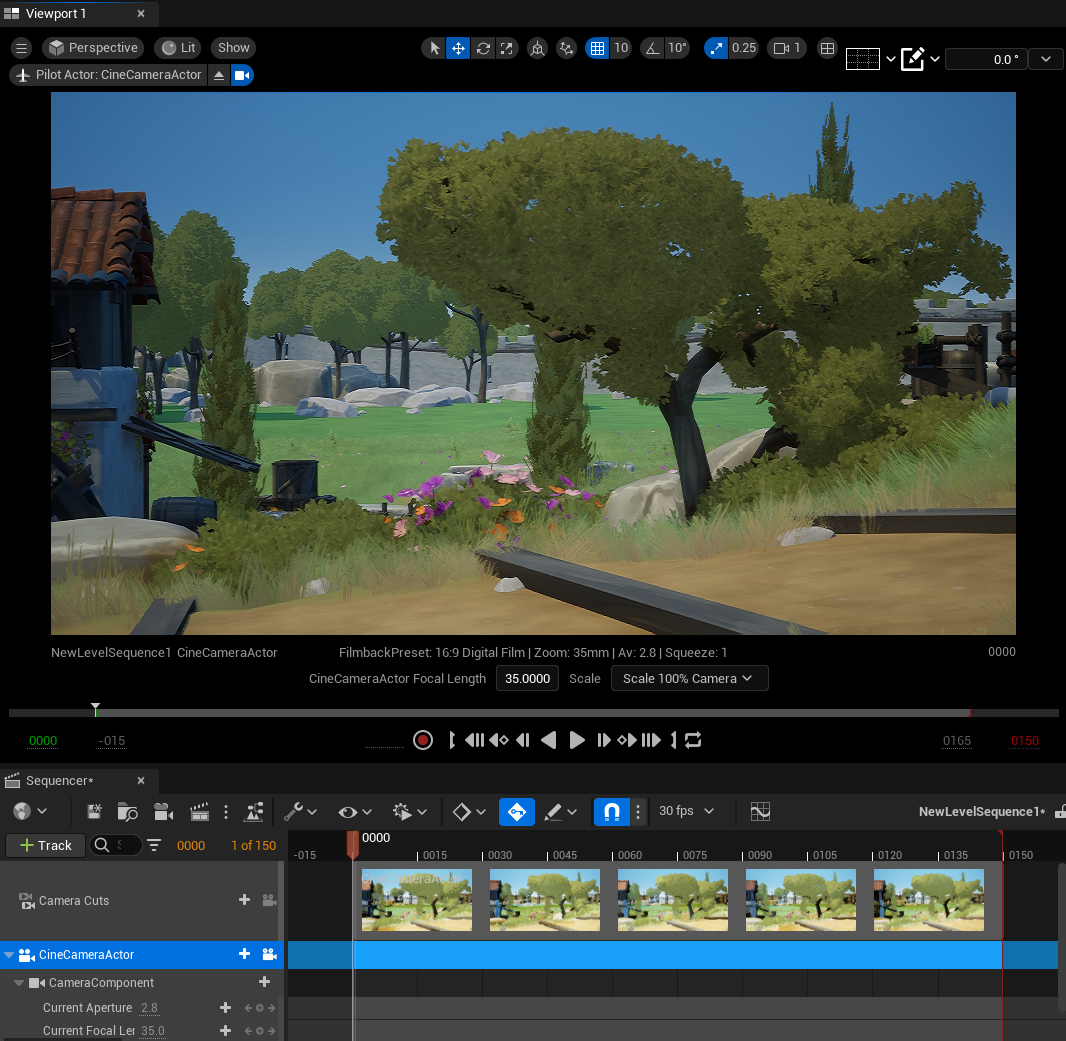
At this point, you can pilot the camera view using the keys Up, Down, Left and Right.
You can also use RMB , LMB or MMB to tilt and pan the view.
If you want to quit the camera view, click on the eject button at the top left corner:

Or unlock the camera view in the Sequencer, by clicking on the camera icon:

Move an object
To move an object from the Level Sequence, this object must be first an Actor placed into the Level. In the example below, we are going to add a boat in the environment.
We open the Content Browser.
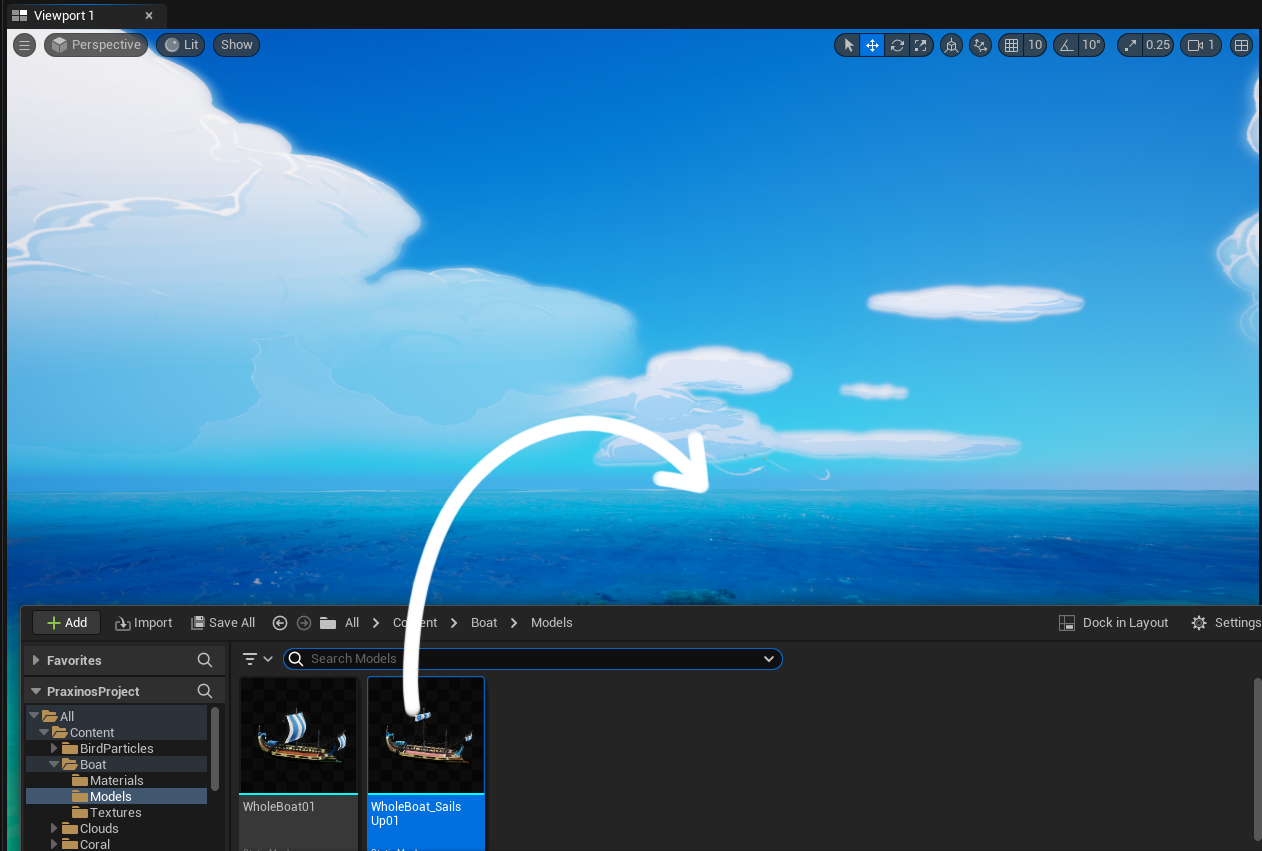
We drag and drop the object to be placed as an Actor (the Asset used in that situation is a Static Mesh). It will create 2 Tracks in the Sequencer.
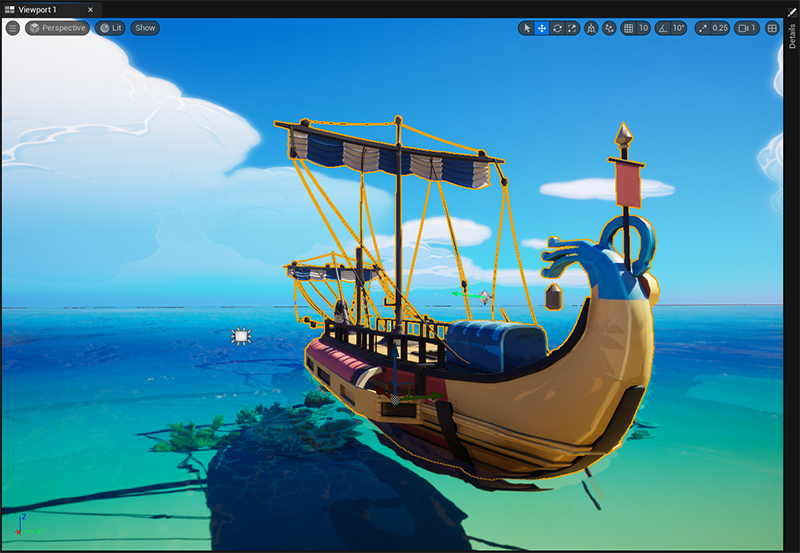
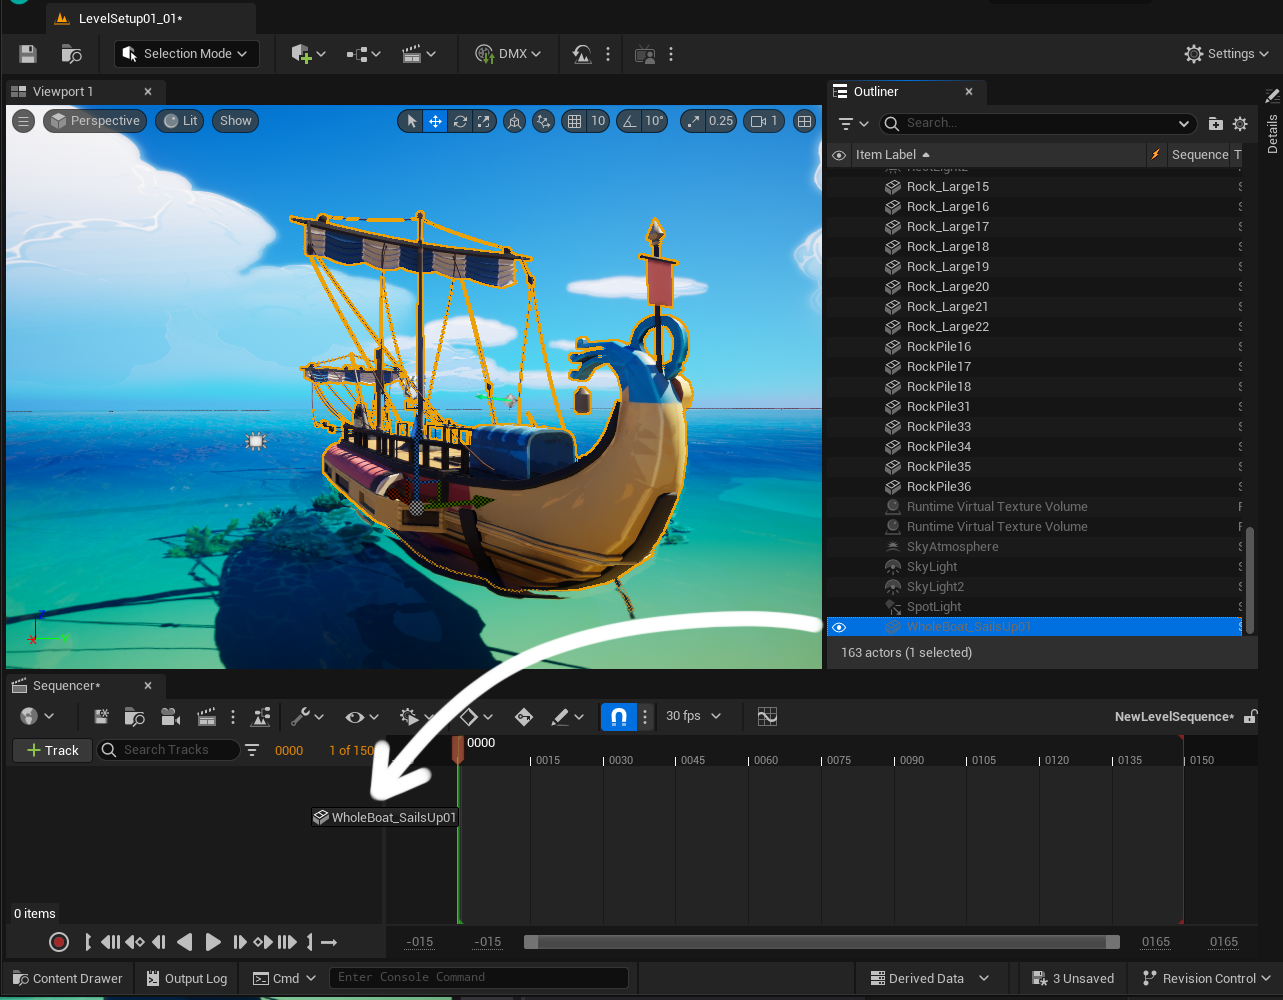
From the panel Outliner, we drag the Actor and drop it into the Sequencer to create a new Track.
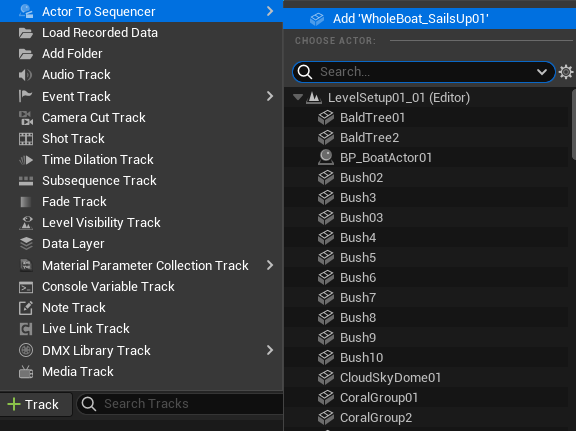
Note
You can also use the button “+ Track” in the Sequencer to add an Actor to *Sequence.
In the Transform Track, we can see a tiny “+”: click on it to create a key.


Scrub the cursor of the timeline in the Sequencer.

In the Viewport, use the gizmo to move the Actor.
Click again on the tiny “+” track in the Transform Track to add another key.

Now scrub the cursor in the timeline and enjoy the result.
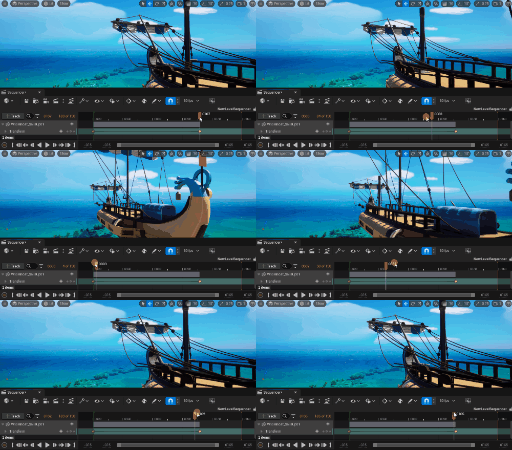
This logic is the same for all movable Actors: Static Meshes, Skeletal Meshes, Cine Camera, Lights, etc.
Note
You can also enable the Auto-Key mode to create a new key each time you proceed with a change.

If you want to know more about keys, how to move them, delete them, etc. please read this guide: https://docs.unrealengine.com/5.3/en-US/creating-animation-keyframes-in-unreal-engine/
Animate a 3D character
In addition of the use of Transform keys, you can also animate 3D rigged characters (Skeletal Meshes).
3D Animation Sequences
Animation Sequences are inherited from Unreal Engine and allows to create a library of recurring animations. This method is used a lot in video games for common actions: idle, jump, duck, shoot, hit, take damage, etc. To make movies or series, using Animation Sequences can be useful to bring the scene to life with characters moving in the background with actions like: walking, drinking, chatting with hand gestures, laughing, scratching a head, reading a book, etc.
This lesson will not teach you how to create 3D Animation Sequences (there is a whole documentation about this in Unreal Engine 5.3 guide). It will just teach you how to use them in a Level Sequence.
Add an animated character to your Content Browser. You can download some for free thanks to the Unreal Engine Marketplace and add them to your Content (more information in that lesson).
Just like in steps 2 & 3 from the previous lesson, drag the Skeletal Mesh of the character.
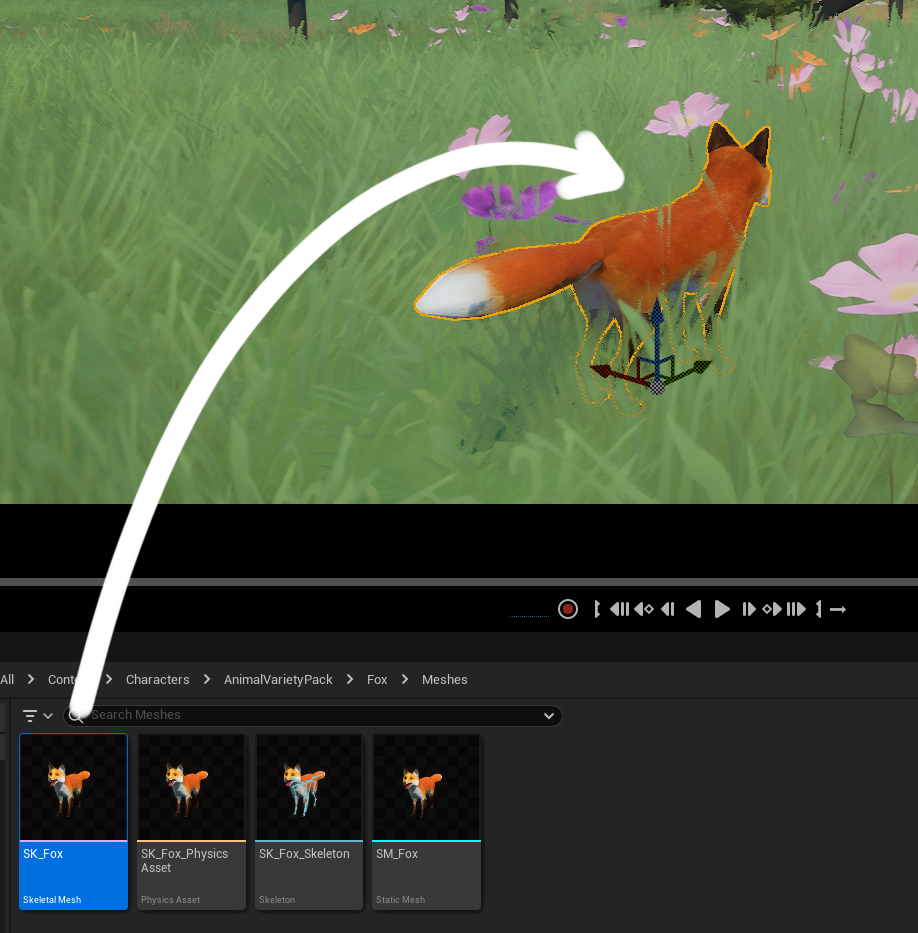
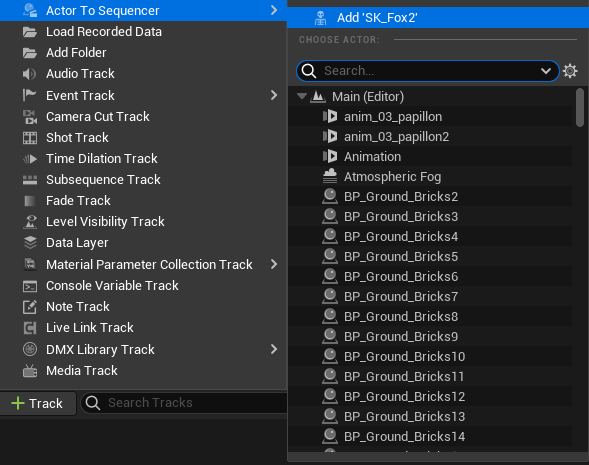
A track “Animation” will be visible by default. Click on the “+” to disaply all the Animation Sequences provided with the character.
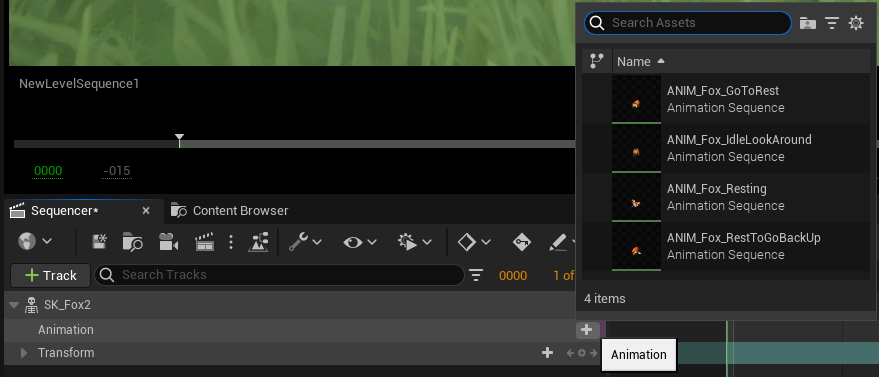
Select an animation in the list to load it in the timeline.

Scrub to see the character’s animation.
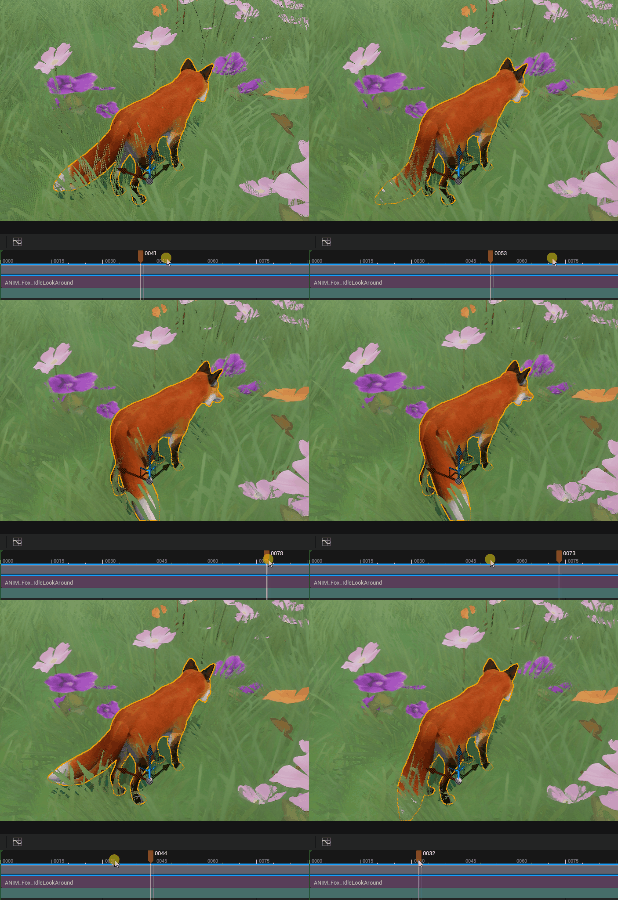
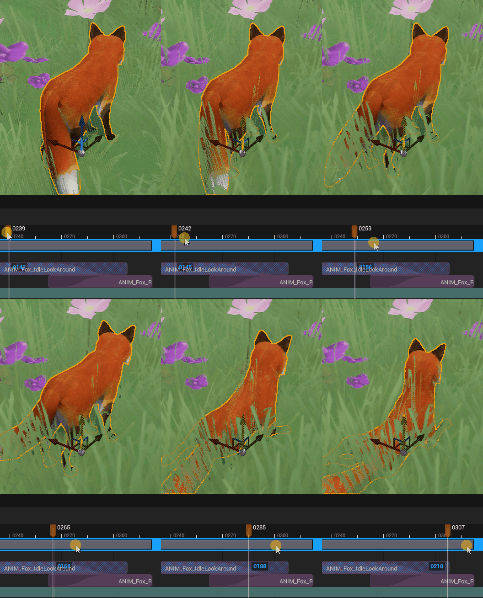
Add another Animation Sequence in the Sequencer.
Move the 2nd Animation Sequence and use handles to create a transition between 2 Animation Sequences.

Congratulations! You know the basics of 3D Animation Sequences.
Note
For more details, please read this lesson in Unreal Engine 5.3 guide.
Control Rig
Control rig will allow you to go much further than Animation Sequences, as it will allow you to control and animate 3D rigged character the way you want.
This lesson from the Unreal Engine 5.3 guide will explain you anything you need to know.