Mix 2d and 3d Sequences
Level Sequences can be used to composite each scenes by mixing 3d animations with 2d elements.
Storyboard Sequences
In the lesson about Storyboard Sequences, you discovered how to create animatics mixing drawings and 3d environment. Once this step of pre-production is done, you can use the storyboard as a reference, either as a Subsequence Track or a Shot Track.
Note
The main difference between Shot and Subsequence Tracks is that Shot Tracks are “unique” (you can only play 1 Shot Track at a time) while Subsequence Tracks are more like “layers” of various actions taking place simultaneously.

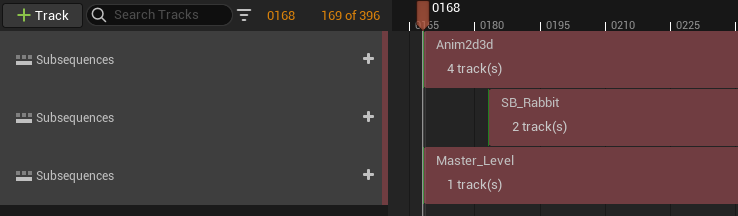
To add a Board Sequence or a Shot Sequence into a Level Sequence (as a Subsequence Track or a Shot Track), open the Content Browser and drag the Asset into a Level Sequence, in the timeline area.
Note
You can still work on the Storyboard from a Level Sequence: just make sure you selected the right Plane in the Outliner.
Media Plate Actors
A Media Plate Actor is a nice feature from Unreal Engine 5.1 which allows to easily add a video reference into the Level. With Odyssey, 2D Animation Assets can be dragged and dropped into the Level to be turned into a Media Plate Actor.
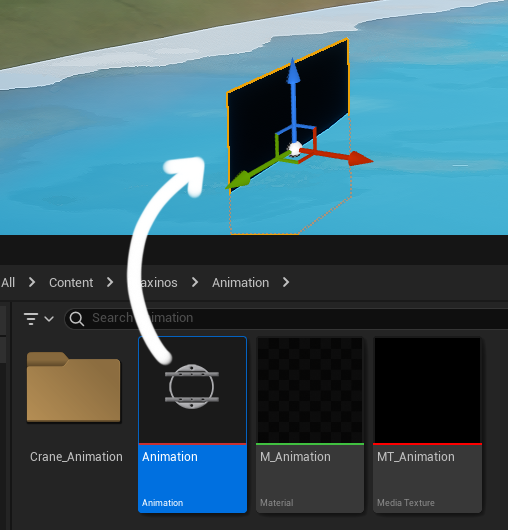
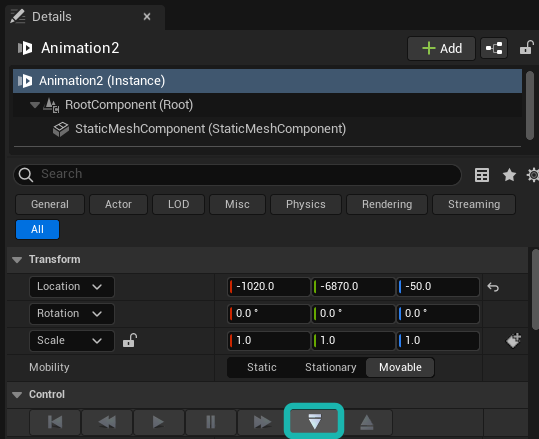
Feel free to change its size, rotation and position with the gizmos. Then, this Media Plate Actor can be played automatically into the Level thanks to this icon in the panel Details:
The Media Plate can also be played at a specific moment thanks to a Level Sequence. To do so:
Drag and drop the Media Plate Actor from the Outliner to the Level Sequence to create a Media Track.
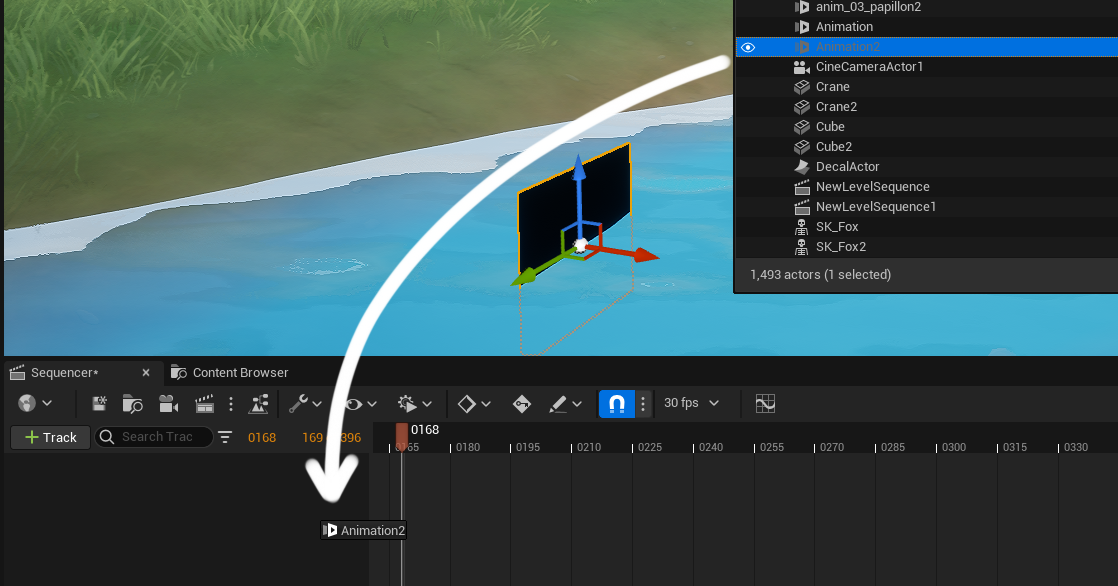
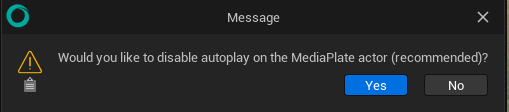
A panel will propose you to disable the autoplay on the Media Plate. It is recommended to say “Yes” to force the Animation to be played only when necessary.
You can then change the position of the Media Track in the timeline or extend the duration of the Media Plate Track in the timeline to loop the animation.

Media Textures
This technique require more steps than Media Plates, but they have the advantage to be used on non-flat objects. It can be used to animate 2D Textures, like a crack on a rock, a drooling drop on a leaf or an insect on a trunk. This animation will be played at a specific moment in the Level Sequence.

However, connecting an Animation, an Actor and a Level Sequence together will require a Media Track (like seen in the lesson above) and a Media Texture. Media Textures will help you to establish a simultaneous connection between a 2D Animation, a Material and a Media Track within a sequence. Thanks to Media Textures, what you see in the 3D environment is coherent with the Sequencer and the 2D Animation.
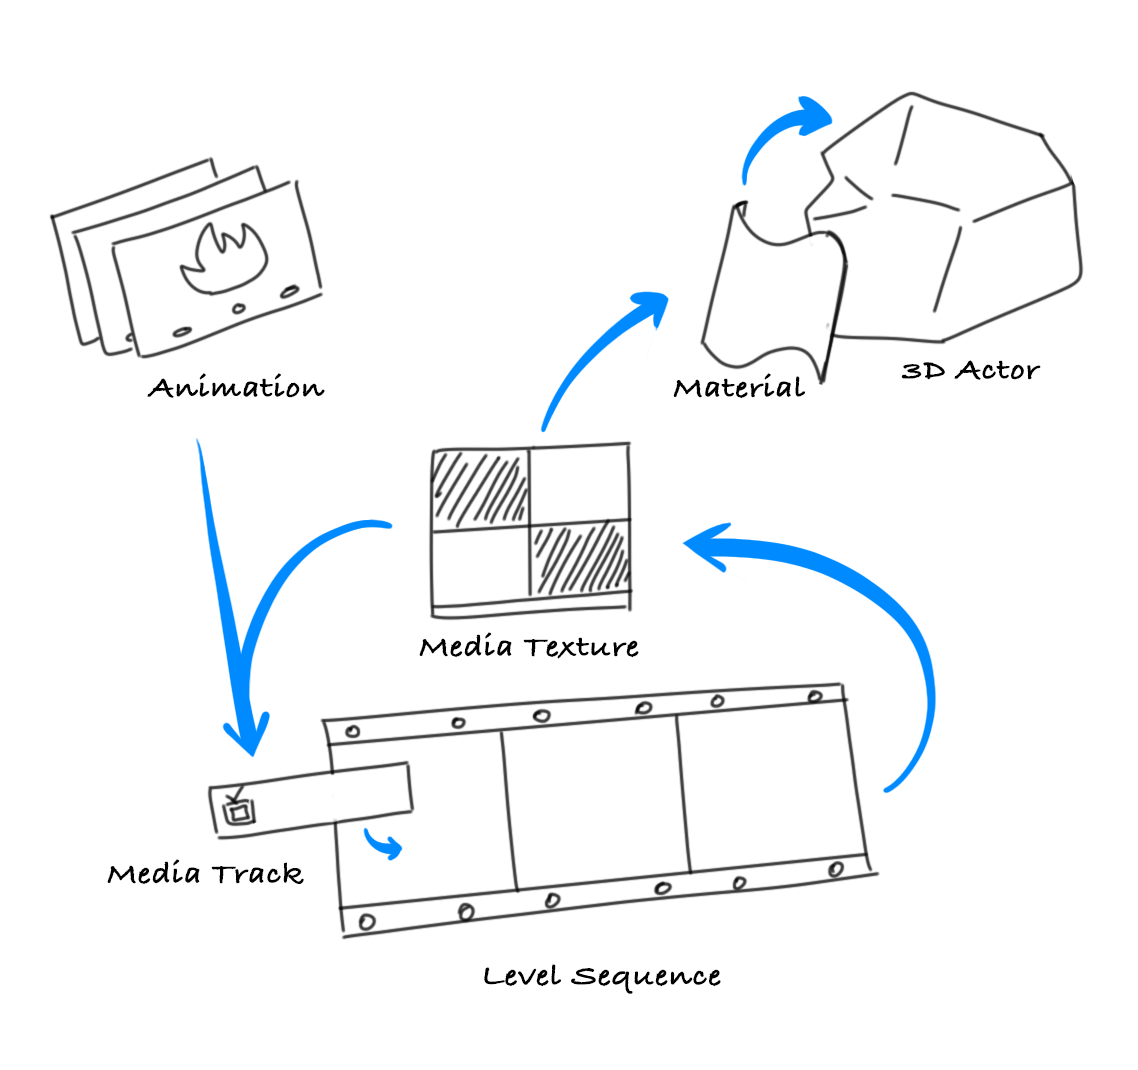
Basically, the Media Texture is used in a Material which is applied to an Actor (Static Mesh, Decal, etc). The Media Texture is combined with the Animation thanks to a Media Track in the Level Sequence. The position of the cursor in the timeline of the Sequencer tells the Media Texture what frame from the Animation should be displayed, so the Material can display an image accordingly. The result is then visible on the Actor. When we play the Level Sequence, the Animation will play on the Actor.
Let’s see step by step how to use an Animation on an Actor thanks to a Media Texture.
Get a Static Mesh in your Content Browser (import a FBX, download from the Marketplace, mmigrate from another project). In this example, we will be using a rock.
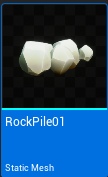
Drag and drop the Static Mesh in the Level to create an Actor.
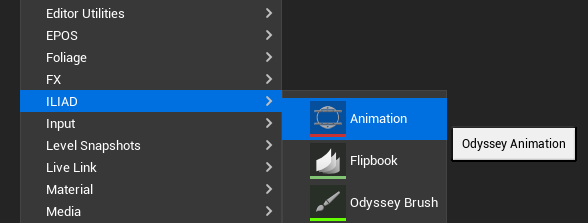
Create an Animation Asset in the Content Browser (right click > Iliad > Animation).
Warning
Pay attention to the definition of the Animation. The default “1902 x 1080” might not correspond to what the Actor needs. In this example, the rock requires a Texture of 1024 x 1024, so the Animation must have the same definition.
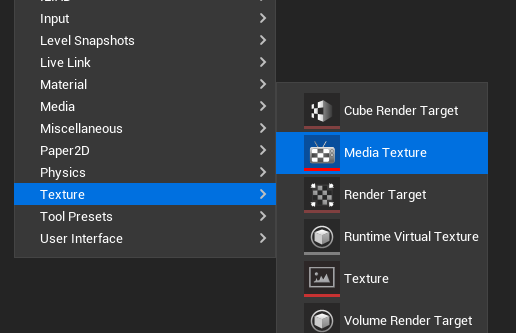
Create a Media Texture in the Content Browser (right click > Texture > Media Texture).
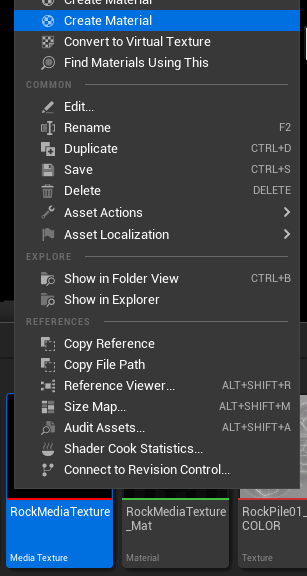
Create a Material from the Media Texture with a right click on it.
Open the Material if you want to change its settings. If you have no idea of how to modify Materials, do not worry: the default configuration will work well too.
Apply this Material to Static Mesh Actor, thanks to the panel Details, in the category Materials. The Actor should appear pitch black.

Create a Level Sequence and open it.
In the button “+ Track”, add a Media Track.
Click on the tiny “+” on the right side and select “Media Source”. In the list, select the Animation you created beforehand.

Once added, make a right click on the small zone (feel free to zoom in the timeline for a better visibility - use Alt+Shift+RMB) and go to the Properties. In the Properties, add the Media Texture you created.
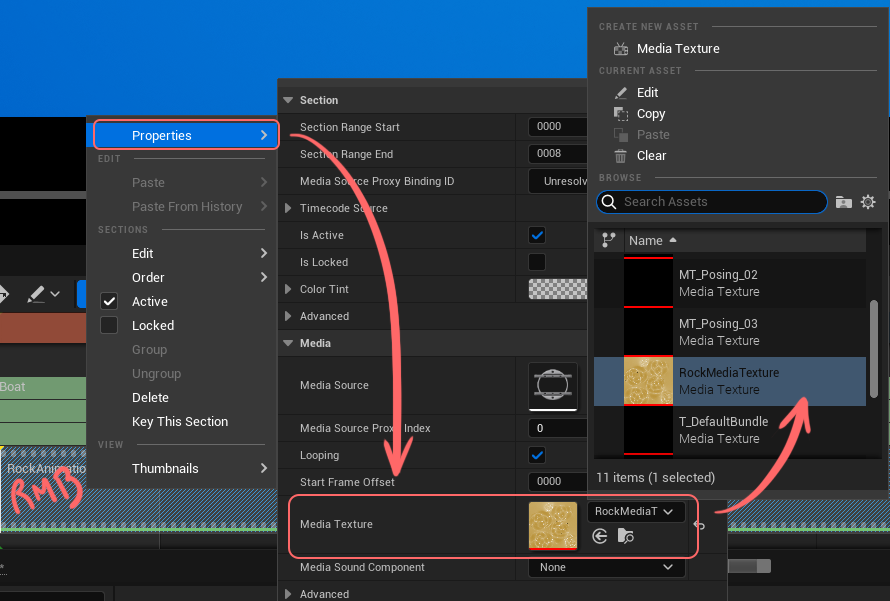
Congratulations, the Animation is now visible on the rock.
Edit 2D Animations in 3D context
When an Animation is available in the Level, it can be edited with the Editor Mode Iliad. The rules that apply to Texture 2D also apply to Animations:
The Actor must be a Static Mesh (or a Media Plate).
The Material properties matters: if it uses Texture Coordinates or Panner, you will not be allowed to draw on the Animation.
If you followed one of the two lessons above, it will be easy to edit your Animations from the Level, without using a 2D Editor.
First, make sure you select the right Actor in the Level.
Enable the Editor Mode Iliad at the top left corner of the interface.
You might need to change a little bit the layout configuration. For instance, the panel “Layer stack” will not be necessary, since you will be using the panel “Timeline”.
Note
When working on the Animation from the Level, you will not be allowed to scrub in the 2D Editor’s Timeline. You can only scrub in the Sequencer. You can assign shortcuts to Step backward (Viewport) and Step Forward (Viewport) in the Sequencer, even if you have the focus on the Actor in the Viewport.

However, even if you cannot scrub in the Timeline, you can select the layer, enable and modify the Light Table, create or delete cells, change the blending mode or add and delete layers.
The Media Track duration in the Sequencer must correspond to the duration of the Animation. If the duration gets too long, it will automatically loop the animation (a white bar will symbolise the repetition)
If you add cells afterwards, make sure to extend the duration of the Media Track too.