Create and Save Levels
Note
Levels are very useful: when you want to try something, you don’t have to constantly create new Odyssey projects.
Instead you can create a new Level to experiment with, and if you don’t like it or if something gets broken, you can delete it.
In Unreal Engine, we utilize the concept of Levels, which serve to partition a game into distinct sections, encompassing various stages or areas. At this moment, we find ourselves within one of the default starter Levels included with the initial content.
You can also duplicate Levels (Right click on the Level icon ▸ “Duplicate”), which means you make a copy of an existing Level and you can now make changes to it without affecting the original. This feature gives you the freedom to explore different design choices and revert back to a previous version if you are not satisfied with the changes.
Create a Level
Let’s now go ahead and create a new one.
1.Go “File” ▸ “New Level” or press CRTL+N
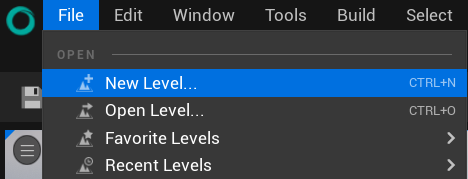
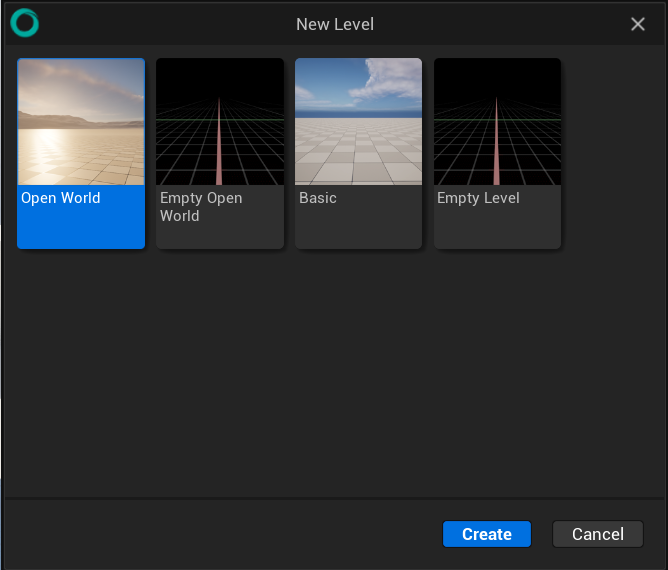
2.Select the Basic Option
Open World: If you are dreaming of creating a game with a big, open world, this template is perfect for you! It provides a starting point with sample content and utilizes the World Partition. This feature will help you create a massive and easily loadable open world environment. It’s a great choice if you want players to explore and roam freely in your game.
Empty Open World: Similar to the previous option, this template also focuses on creating an open world with the World Partition feature. However, it doesn’t include pre-made lighting or terrain. It is a blank canvas where you can design and shape your world from scratch, giving you complete control over its look and feel.
Basic: This is an excellent option because it includes essential features such as lighting, a floor, and effects such as atmosphere and fog. This template provides a solid foundation upon which to build if you are a beginner looking to gradually learn and experiment with these concepts.
Empty Level: This template provides exactly what it says, a completely empty Level with nothing in it. It’s the template you will probably choose the most because it gives you the freedom to design and create your own experiences from scratch.
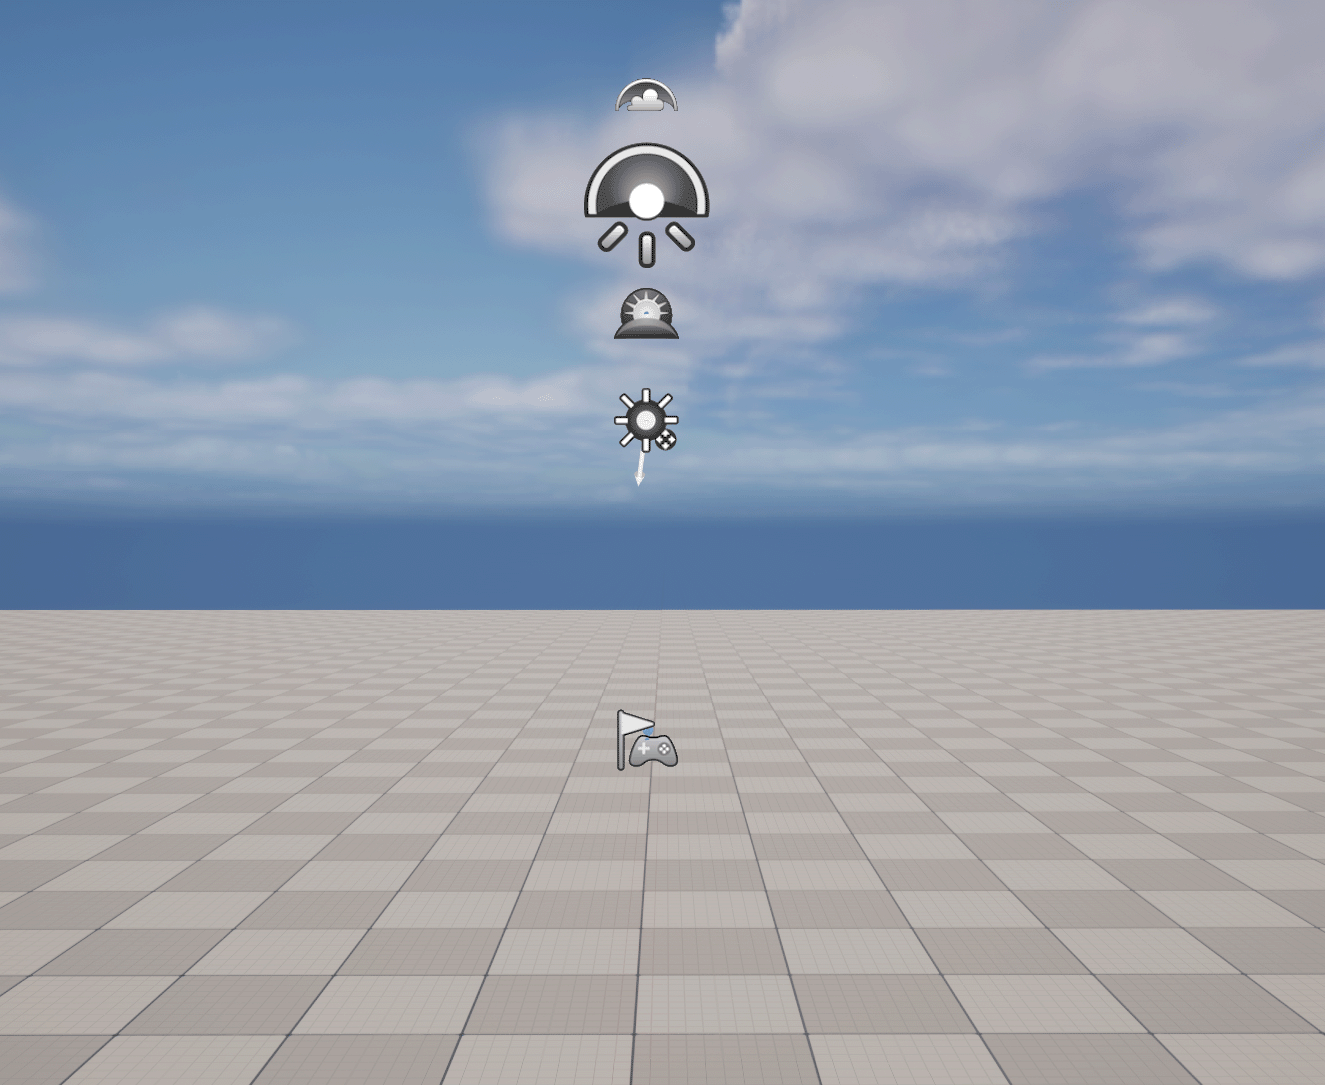
This will create us a brand new Level with a few things already in it.
Over in the World Outliner you will see that we have a floor model, a light, a player start and a few skybox objects. These help build the scene we see here.
Select an another Level and it will open in the viewport. This will also cause the currently open Level to save and close.
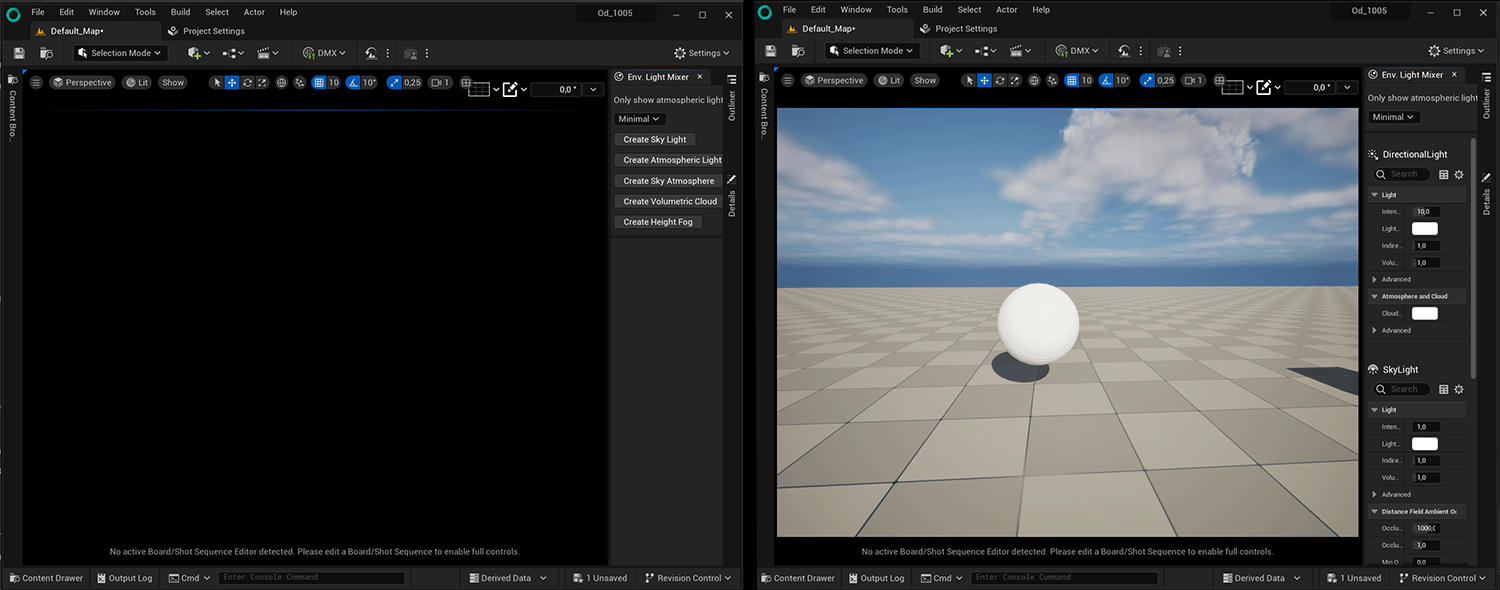
Environment Light Mixer
It is essentialy a one click lighting tool, it allow to easily and quickly controlling and oranizing the lighting in the environment.
To understand how it works, you can open a New Empty Level.
In the Main Menu select “Window”” ▸ “Env.LightMixer” and a new tab will open.
Now clic on all five ‘create’ buttons to set up basic lighting for your map.
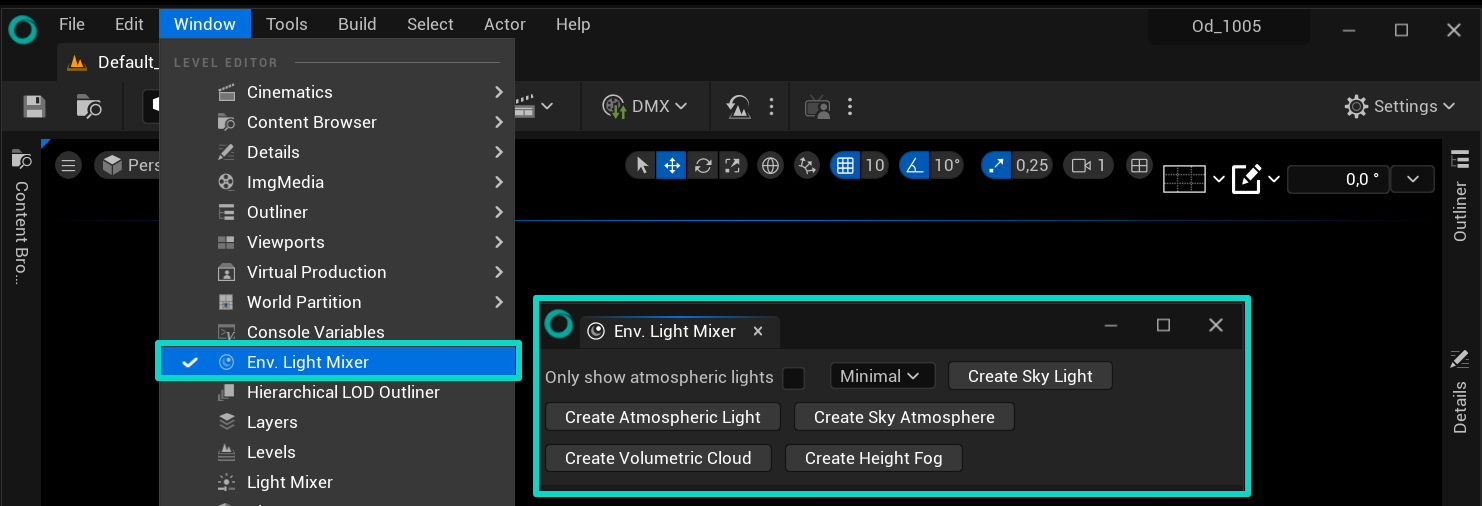
The Level will be completely illuminated once the lights have been created.
Save and Load Levels
To save, navigate to the top menu and choose “File ▸ Save Current Level” or just press CTRL+S.
Now a Level thumbnail will appear in the Content Browser, and you can name the Level. Keep in mind that being organized is key when working on large projects.
When you close Unreal Engine and reopen this project, you can click on the Level you just created to continue where you left off. Or select “File” ▸ “Open Level…” or just press CTRL+O.
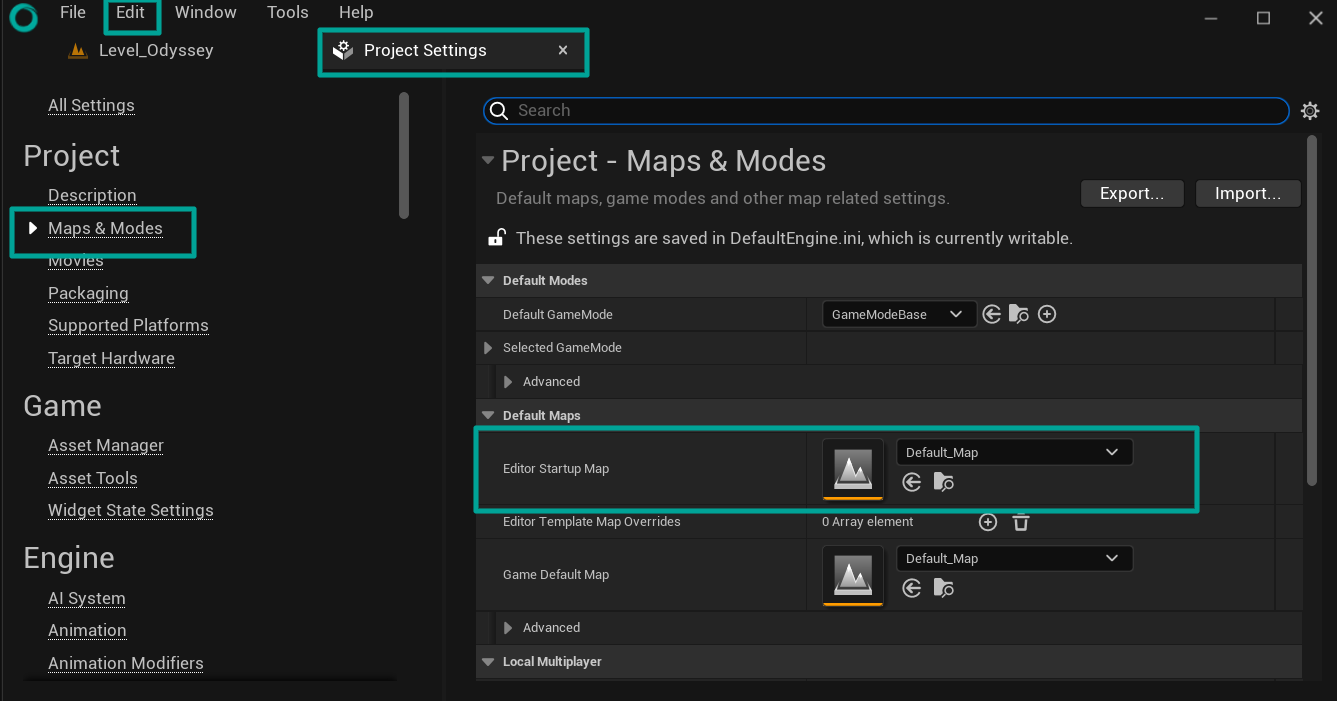
Set a default Level
Navigate to “Edit” ▸ “Project Settings” in the top menu.
Select “Maps & Modes” from the “Project” section in the left column.
Alternatively, type “Map” in the top search bar.
You should get the menu as shown in the screenshot below.
In the “Default Maps” section you will change the “Editor Startup Map”” :
This is the Level that opens automatically when you start the Unreal Engine editor. It determines which Level you will see and work on for editing and designing. It helps make your work smoother by letting you start right away with a specific Level, without needing to manually choose it every time you open the editor.
Game Default Map: On the other hand, the “Game Default Map”” is the Level that loads automatically when you play or launch your game. It’s the first Level that players experience when they start playing a game.
Note
What sets apart Maps from Levels?
Levels within Odyssey are saved in .umap file format, and they are occasionally called maps.
However, it’s important to note that these terms are essentially interchangeable; Levels and maps are synonymous, so there’s no need for concern about the distinction.
Rename a Level
To rename a Level, you can hold the click on the Level asset from the Content Browser, or make a right click and choose “Rename” from the contextual menu.
A message might be displayed to let you know that .ini will be updated. Click “Ok” and proceed.
Warning
If the Level that got renamed is the one used as a “Game Default Map”, you must reassign it in the Project Settings, or you may experience troubles at the next Launch.
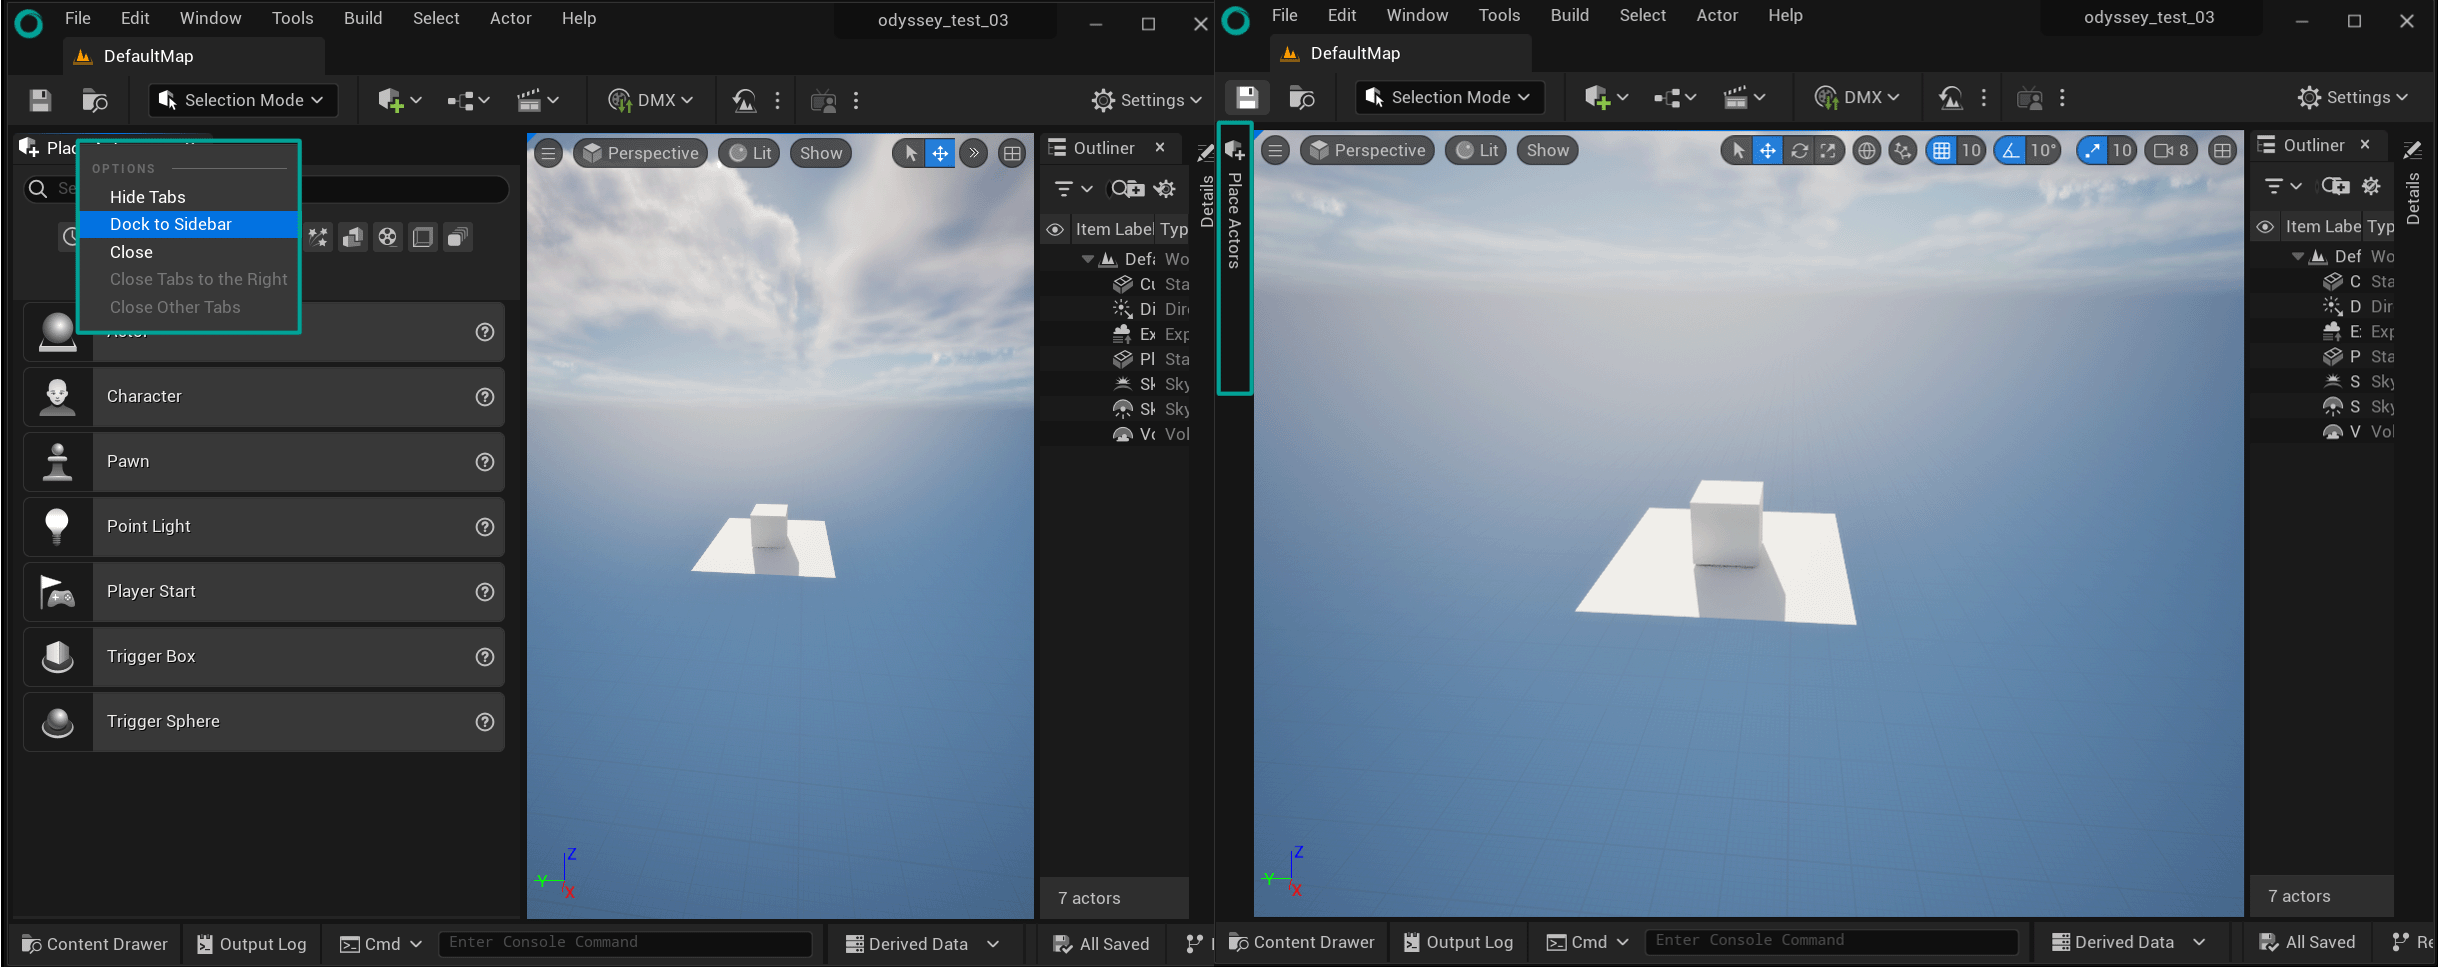
Level Editor
Odyssey, like Unreal Engine, is split up into a number of different editors (Material Editor, Blueprint Dditor, Texture Editor, etc). In the image below, you can see the Level Editor.
As in every other editor in Odyssey you can move the panels and dock them everywhere you want and save your layout.
Move and dock panels
To dock to sidebar, you can open a new window then slide it arround in showed HUD. Then you can right click ont the title of the window and click on “Dock to sidebar”.

To have a clear view of your 3D viewport you can hit the shortcut F10 to dock all your windows.
Save and load layout
You can save your new layout in “Window” ▸ “Save Layout” ▸ “Save Layout As…”
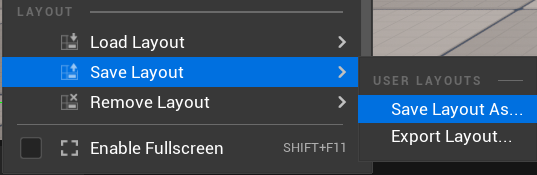
To load a specific layout, go to “Window” ▸ “Load Layout” and select the one to be loaded.